


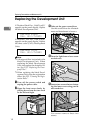
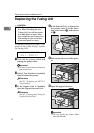

Replacing the Fusing Unit
19
1
G
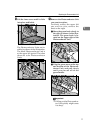
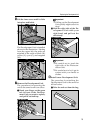
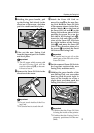
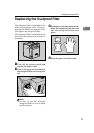
Holding the green handle, pull
up the Fusing Unit slowly in the
direction of the arrow, and then
put it in a stable and level place.
H
Take out the new Fusing Unit
from the bag and put it in a stable
and level place.
Important
❒ The A3 paper which comes with
the new Fusing Unit will be
used in a later step
S
, so be care-
ful not to lose it.
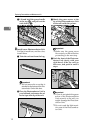
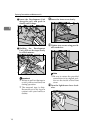
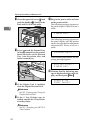
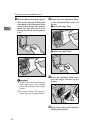
I
Remove the Fuser Oil Unit in the
direction of the arrow.
Important
❒ Do not touch inside of the Fus-
ing Unit.
❒ Be careful not to touch the oil.
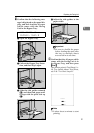
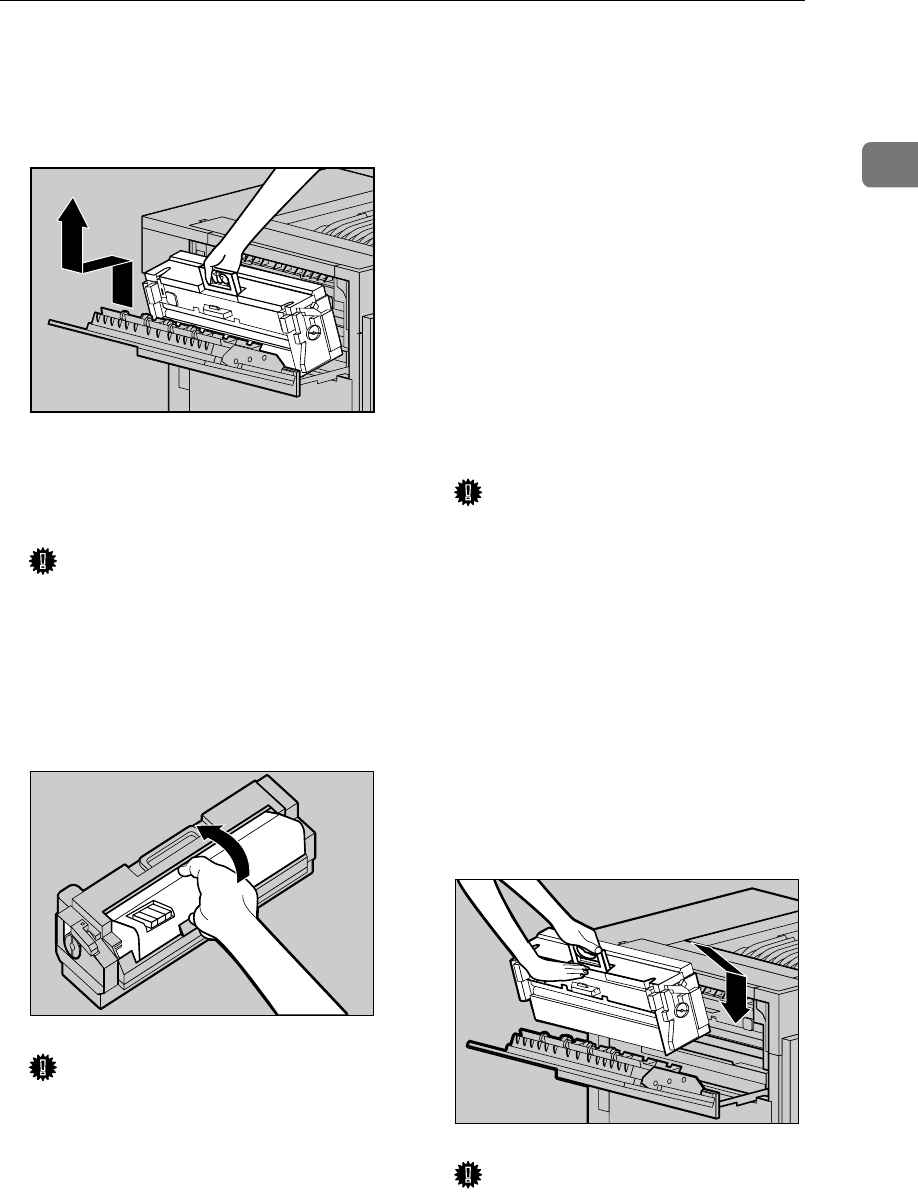
J
Attach the Fuser Oil Unit re-
moved in step
I
to the new Fus-
ing Unit. Hold the Fuser Oil Unit
in the manner shown in the illus-
tration. Match (U
UU
U) on the front of
the Fuser Oil Unit and (T
TT
T) on the
Fusing Unit at three places. While
pushing the green lever on the
left side of the Fusing Unit (A
AA
A),
insert the left and right protru-
sions of the Fuser Oil Unit into
the white holders of the Fusing
Unit (B
BB
B), and move the Fuser Oil
Unit in the direction shown by
the arrow (C
CC
C) to attach the Fuser
Oil Unit to the Fusing Unit.
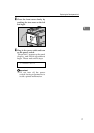
Important
❒ Be careful not to get oil on the
metal part of the left side of the
Fuser Oil Unit
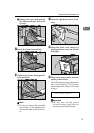
K
Put the removed Fuser Oil Unit in
the bag that enclosed the new
Fusing Unit, and then seal it.
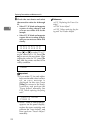
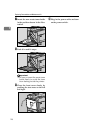
L
Holding the green handle of the
new Fusing Unit, use your other
hand to push the area right in
front of the handle to create a
slight slant, and then push the
Fusing Unit slowly to the back.
Important
❒ Confirm that the Fuser Oil Unit
is facing the inside of the printer.
❒ Confirm that the Fusing Unit is
properly positioned in the ma-
chine.
ZDJH208J
ZDJH052E
ZDJH050E