


63
Test-Um NT955 Series
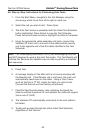
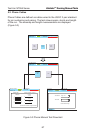
4.6. Step by Step Instructions for Performing Auto Tests
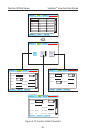
1. From the Start Menu, navigate to the Job Manager using the
arrow keys which move from left to right on each row.
2. Select the Job you wish to test. Press Open.
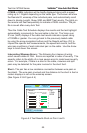
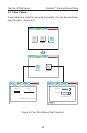
3. The Auto Test screen is presented with the Cable Test Schedule
button highlighted. Press Select to view the Test Schedule.
Press the up and down arrows to highlight the cable to be tested.
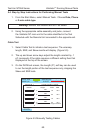
4. Using the appropriate cable assembly and jacks, connect the
Validator-NT main unit to one end of the cable and the remote
unit to the opposite end of the rst cable identied in the Test
Schedule.
Note: The Wiremapping Remotes (TP610) test wiremapping only and
are NOT designed to work in the Auto Test mode. The Test Results will
indicate Fail because the Validator was not able to perform a complete
test sequence.
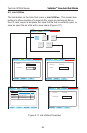
5. Press Test.
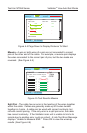
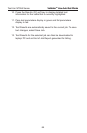
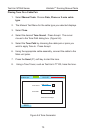
6. A message displays if the Main Unit is not communicating with
the Remote Unit. If the Remote unit is not found, the main unit
automatically sends tone on the cable. Using a Tone Tracer,
such as Test-Um’s TT100, locate the cable you wish to test.
Connect the Remote unit and testing will proceed.
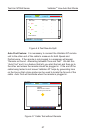
7. Pass/Fail Test Results display, also indicating the speed the
cable is certied to perform at, and whether the cable will support
Voice over IP (VoIP).
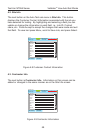
8. The Validator-NT automatically increments to the next cable to
be tested.
9. Testing will proceed through the entire Cable Test Schedule
regardless of test failures.
Validator
TM
Running Manual TestsValidator
TM
Running Manual Tests