®
10
Appearance
Remote Control Instructions
Reection may be affected by the environment under some circumstances. Aim the remote control at the project to try again if it
happens. Replace batteries with new ones if the effective distance of the remote control is decreased or the remote control does not
work.
When the terminal of the remote control cable is inserted to the wired control terminal of the projector, the projector will
automatically switch to the wired control mode and cannot be controlled through the IR signal of the remote control. Disconnect
the wired control terminal on the projector if you want to control through the IR signal of the remote control.
Pay attention to the installation environment because the signal may not work due to interference if the IR remote sensor is
exposed to the bright sunlight or uorescence.
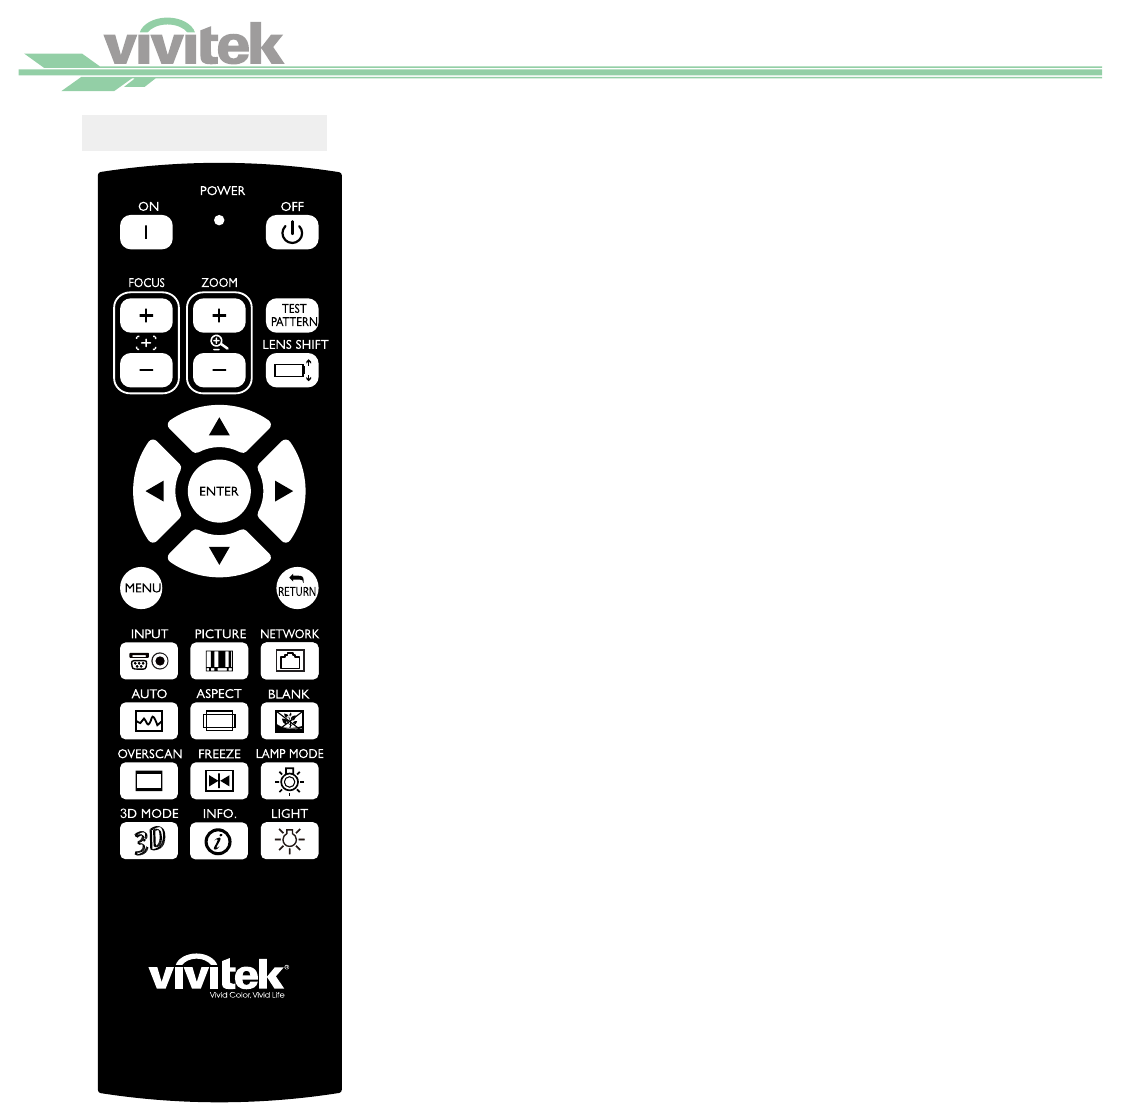
Remote Control
ON
Use this button to turn on the pro-
jector.
OFF
Use this button to turn off the pro-
jector.
FOCUS
Adjust the focus of the projected
images.
ZOOM
Zoom in/out the projected images.
TEST PATTERN
Use this button to display the test
image. Press to switch to the next
test image and press the RETURN
button to return to the projected
image.
LENS SHIFT
Use this button to shift the lens to
the right, left, top or down.
ENTER
Use this button to select settings
or confirm the changed settings.
MENU
Press the button to display or hide
the previous level or OSD menu.
Return
Press this button to return to the
menu on the exit the OSD menu.
INPUT
Press this button to select the
input source.
PICTURE
Start to adjust the image.
NETWORK
Press this button to enter the LAN
menu.
AUTO SYNC
Press this button to carry out auto-
matic signal synchronization.
ASPECT
Press this button repeatedly to
select the proportion for the next
screen.
BLANK
Press this button to temporarily in-
terrupt the projection.
OVERSCAN
Press this button to select the over-
scan mode.
FREEZE
Freeze/unfreeze the projected im-
age.
LAMP MODE
Press this button to select dual
lamp, Lamp 1 Lamp 2 or Single.
3D MODE
Display the 3D settings menu.
INFO.
Display the Projector message.
LIGHT
Not available for this model.


