PROGRAMMING: GETTING STARTED PROGRAMMING: GETTING STARTED
4847
In this section you will learn how to write programs to make your WonderBorg move.
Exercise 1: Creating a Program that Simply Makes the
Robot Go Forward
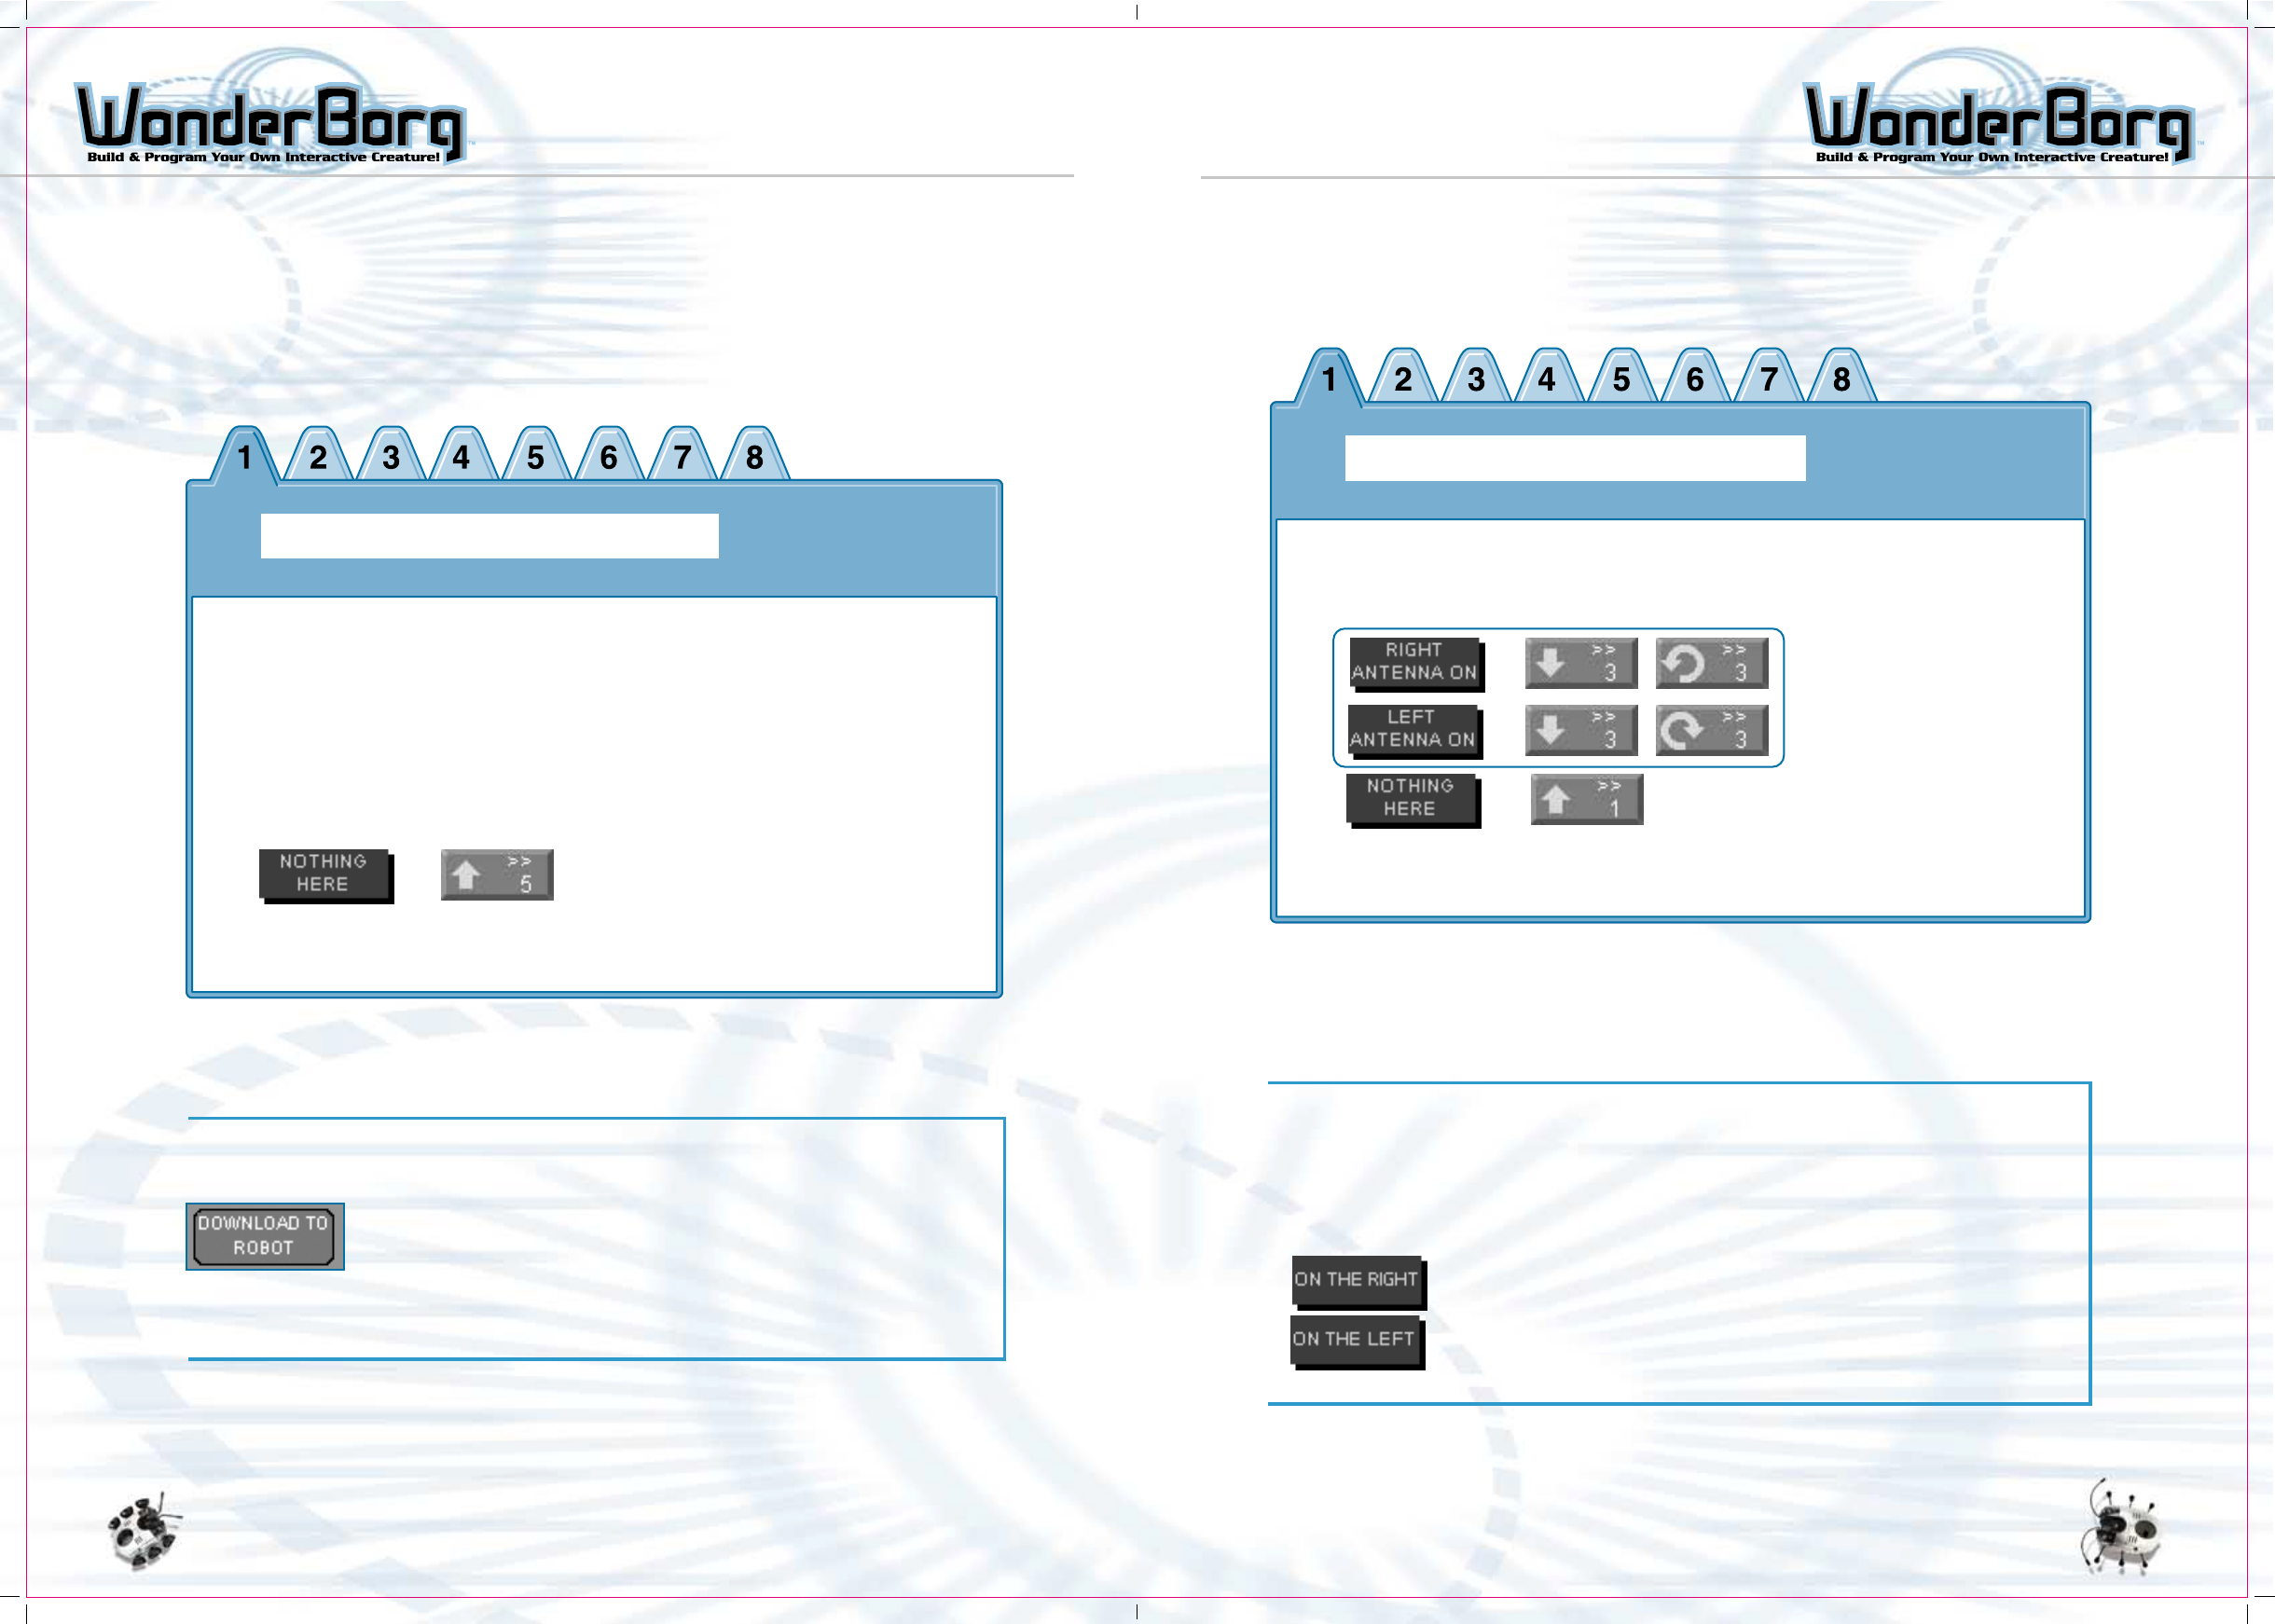
We’re now going to program the WonderBorg to continuously walk forward, like toy robots.
Testing
The next step is to send the program to your WonderBorg, and
make it execute the program. Turn the WonderBorg’s POWER switch
ON, place it in front of the Interface, and click the "download
to robot" button at the top right of the Panel screen. If the
WonderBorg gives a short beep, the transmission has been completed
successfully. If you now press the START/STOP button on the
WonderBorg’s back, the robot will start moving. To stop the robot
when it is moving, press the START/STOP button again.
If there is no sensor reaction, the WonderBorg will take one step forward. By repeating
this action, it will move forward continuously. Even if its antennae touch something,
it has not been told what to do in this situation, so it will just keep going forward.
Panel 1
Programming Exercises
Exercise 2: Modifying the Program so that the
WonderBorg can Avoid Obstacles
We’re now going to modify the program from Exercise 1 so that the WonderBorg will use
its touch sensor to detect obstacles, and take evasive action.
Here, the program for Exercise 1 is augmented with commands to be executed if the
antennae reacts. If the right antenna reacts, the robot is instructed to back up and
rotate to the left, and if the left antenna reacts, to back up and rotate to the
right. If both antennae react at the same time, the upper sensor block takes priority.
In this case, the right antenna is prioritized, so the robot will back up and rotate
to the left.
Testing
It is now time to test the program. By making the WonderBorg execute this program
in various different locations, you will be able to find out what works best in terms
of the number of steps taken when going backward and when turning. You can alter the
numbers in the program very easily by double-clicking the appropriate command block
and then typing in the new number.
Although this program uses the touch sensors, the infrared
sensors can also be used in the same way. Try replacing "right
antenna" with "something on the right", and "left antenna" with
"something on the left". Again, the numbers can be altered very
easily just by double-clicking the appropriate block and typing
in the new number.
Panel 1
Add this section to the program from Exercise 1


