1413
3-6
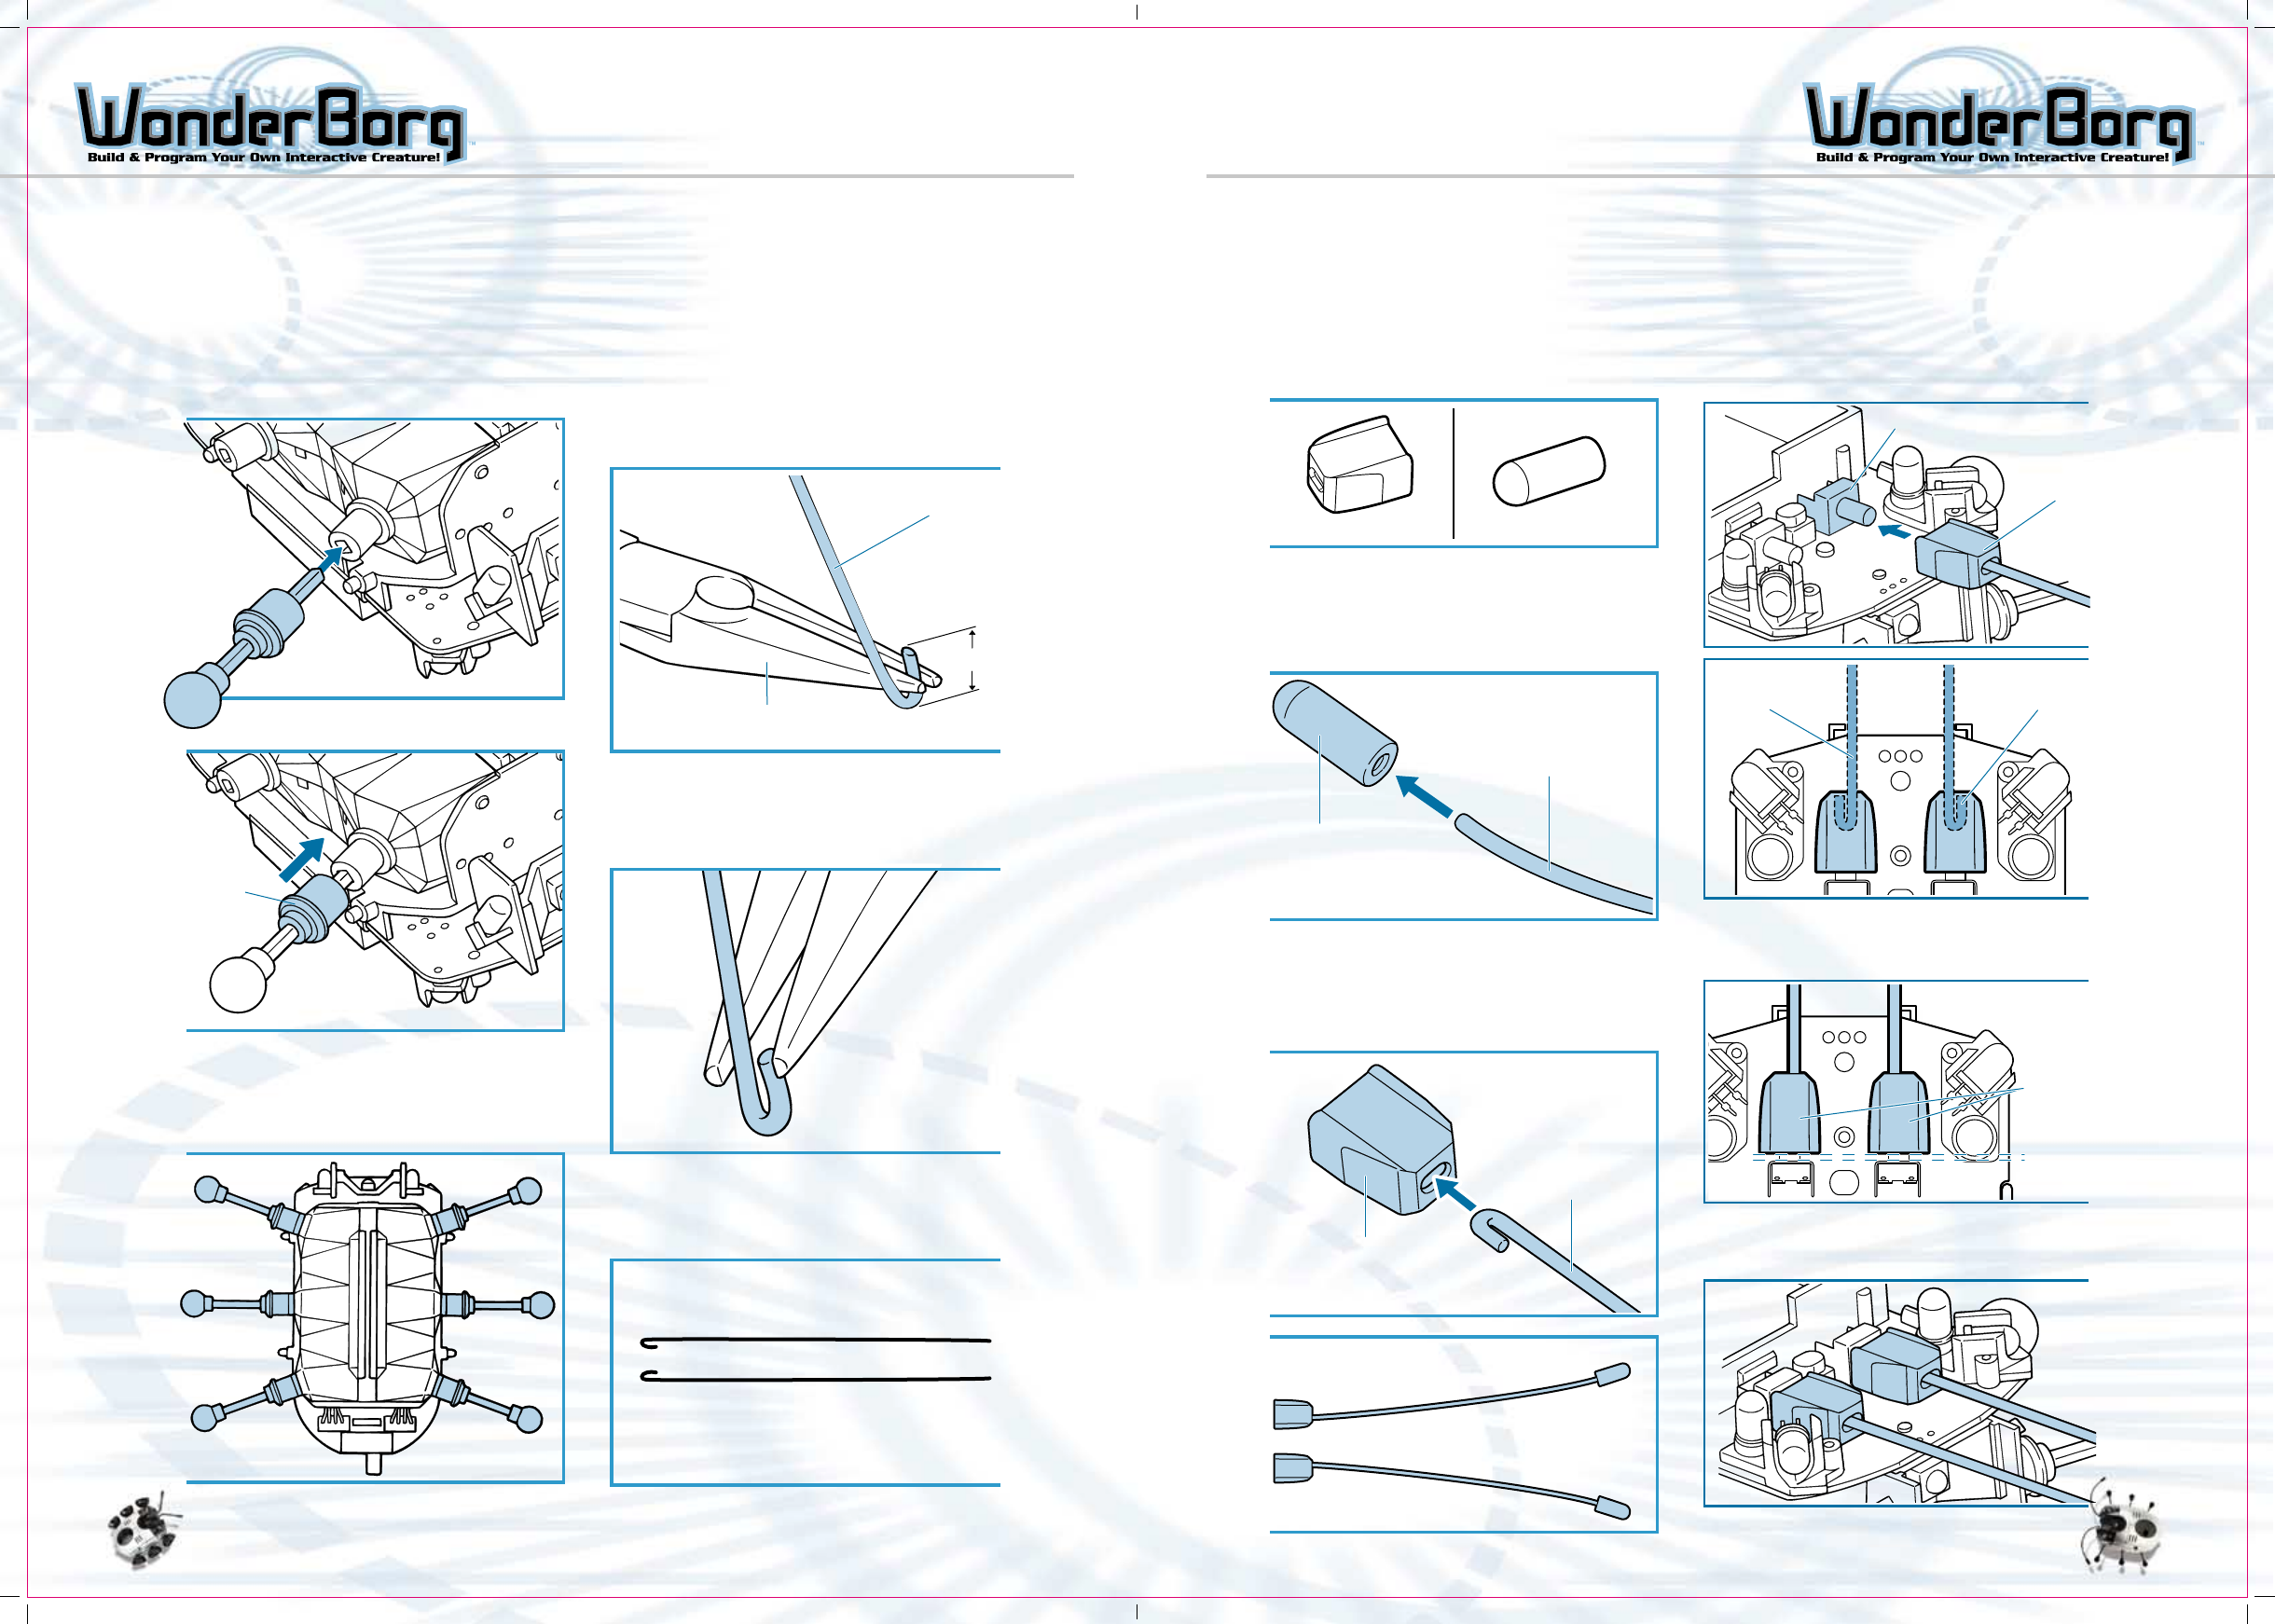
Insert the legs into the sockets on the
WonderBorg’s body.
Push each segment of plastic-covered leg
wire into the socket as far as it will
go. If you have difficulty inserting the
wire, push it in from a slight angle.
3-7
Fit all six legs in the same way. Fitting
the legs is now complete.
4-1
Using the wire-cutters, cut a length of
about 15cm off the plastic-covered antenna
wire (use the handy ruler on the page 56
of this manual).
4-2
Using the needle-nosed pliers, bend back
the last 5mm or so of the wire.
4-3
Using the needle-nosed pliers, squeeze the
bent end of the wire to sharpen the bend.
4-4
Do the same thing to another identical
piece of wire.
Leg
Housing
Needle-nosed pliers
Antenna Wire
5mm
Fitting the Legs
Fitting the Antennae
4-5
Using the wire-cutters, snip two of the
antenna sockets and two of the antenna
protectors off the runner. (The other
two antenna protectors are spares.)
4-6
Insert the end of one of the segments of
plastic-covered antenna wire into an
antenna protector as far as it will go.
Do the same with the other one.
4-7
Insert the bent end of one of the antennae
into one of the antenna sockets, as far
as it will go. Do the same with the other
one.
4-8
Plug one of the antenna sockets on to one
the motherboard’s touch sensors, as shown
in the diagram. When you do this, the cut
end of the plastic-covered antenna wire
should be facing outwards.
If you push the antenna socket too far
in, the touch Sensor may be unable to
react. Leave a space of about 1 mm.
When both the left and right antenna
sockets have been installed, the antenna
installation is complete.
The WonderBorg’s body is now complete.
Antenna ProtectorAntenna Socket
Antenna
Protector
Plastic-covered
Antenna Wire
Plastic-covered
Antenna Wire
Antenna
Socket
Touch Sensor
Antenna
Socket
Short end on
the outside
Long end on
the inside
View from above
Antenna
Socket
Fitting the Antennae
HARDWARE BASICS
HARDWARE BASICS


