


368 Printing Guide — Managing Fonts with Font Manager
Managing Fonts with Font Manager
The Agfa Monotype Font Manager 2000 program can be used to manage your fonts in Win-
dows. This program can be launch by clicking [Run Font Manager] on the Fonts tab of the
printer driver.
It can:
• Search your local and network drives for fonts.
• Install and uninstall fonts in Windows.
• Remove fonts from your computer.
• Preview or print the fonts on your computer or network.
• Create font groups for personal or workgroup projects.
• Sort your fonts in a variety of ways, etc.
Installing Font Manager
For e-STUDIO4511 Series, the Agfa Monotype Font Manager 2000 can be installed from the
Client1 CD-ROM. For instructions on how to install the Font Manager for e-STUDIO4511
Series, refer to the section that describes the installation using the Installer in the Client1
CD-ROM.
For e-STUDIO450 Series and e-STUDIO280 Series, the Agfa Monotype Font Manager 2000
can be installed from the Font CD-ROM that comes with the Printer Kit or Printer/Scanner Kit.
To install the Font Manager for e-STUDIO450 Series or e-STUDIO280 Series, double-click the
“Setup.exe” file in the Font CD-ROM and follow the screens.
Searching Fonts
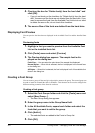
The first time you start Agfa Monotype Font Manager 2000, the Find Fonts dialog box appears
automatically. Before installing a font in Windows, you have to search the available fonts that
can be installed by Font Manager 2000.
Searching fonts
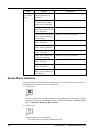
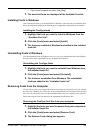
1. Click the [Fonts] menu and select [Search for Fonts...].
• The Find Fonts dialog box appears.
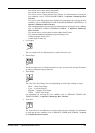
2. Select which drive you want to search for fonts.
Selected Drives — Select this to choose one of the drives when searching for
fonts.
All Drives — Select this to search on all drives when searching for fonts.
Selected Paths — Select this to enter the path to the drive when searching for
fonts. Enter the path to the drive you want to search when you select this.
3. Click [OK].
• When you select “Selected Drives”, Continue to the next step.
• When you select “All Drives”, skip to Step 6.
• When you select “Selected Paths”, skip to Step 6.
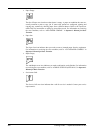
4. The Select Drives dialog box appears.
5. Select a drive to search for fonts from the list and click [OK].
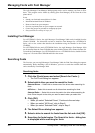
6. Searching for fonts begins. The Search for fonts... dialog box
is displayed while searching for fonts.