


3-11
3
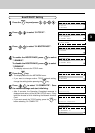
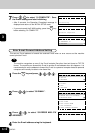
E-mail Address Setting
This sets the E-mail address of the machine.
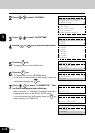
1
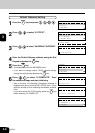
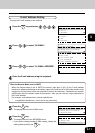
Press the key and press .
2
Press to select “05.E-MAIL”.
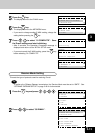
3
Press to select “01.E-MAIL ADDRESS”.
E-MAIL ADDRESS
ENTER E-MAIL ADDRESS(MAX254):
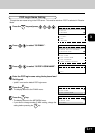
4
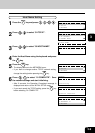
Enter the E-mail address using the keyboard.
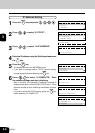
5
Press the key.
• The display returns to the E-MAIL menu.
E-MAIL
01.E-MAIL ADDRESS
02.ERROR MAIL FW ADDRESS
03.RECEIVE MODE
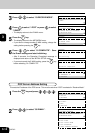
When the Receive Mode is set to SMTP
When the Receive Mode is set to SMTP, the domain (right part of “@”) of your E-mail address
becomes an added sub-address to the domain name of the mail server (or full quality domain name
assigned on the mail server which set to transfer E-mails to this machine). Please ask your network
administrator about the domain name of the machine. Also, you can use any unique username for
the E-mail address.
For example: sub-address=host1, domain=toshiba.com
xxxxx@host1.toshiba.com (xxxxx can be any username)
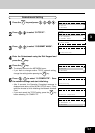
NETWORK
01.COMPLETE
02.TCP/IP
03.NETWARE
04.APPLE TALK
05.E-MAIL
06.FTP
07.LAN FAX
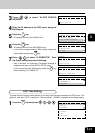
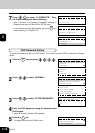
6
Press the key.
• The display returns to the NETWORK menu.
• If you want to change another E-MAIL setting, change the
setting before pressing the key.
NETWORK
03.NETWARE
04.APPLE TALK
05.E-MAIL
E-MAIL
01.E-MAIL ADDRESS
02.ERROR MAIL FW ADDRESS
03.RECEIVE MODE
04.POP SERVER ADDRESS
05.POP TIME
06.POP LOGIN NAME
07.POP PASSWORD
08.SMTP SERVER ADDRESS