


Using the projector and remote control
21
English
Adjust the image
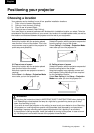
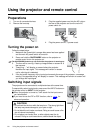
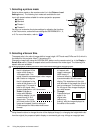
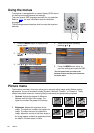
Adjusting the angle height
Turn the two feet on the bottom of the projector
to adjust the image height and projection angle (see
illustration at right).
If the screen and the projector are not perpendicular to each other,
the projected image becomes distorted (trapezoidal). To correct
this problem, adjust the Keystone value in the Setup menu.
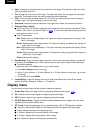
Auto-adjusting the image
When you press the Auto button on the projector, the built-in intelligent
auto-adjustment function will readjust the values of Frequency and
Clock to provide the best image quality.
The current source information will display at the bottom right cornor of
the screen for 3 seconds.
The screen will be blank while the auto-adjustment is functioning.
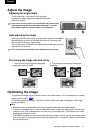
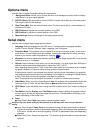
Fine-tuning the image size and clarity
Optimizing the image
To optimize the image, use the remote control or on-screen menus. For the operation of on-screen
menus, please refer to .
The following steps are optional. You do not need to follow every step. It depends on the image
quality you desire.
Note
• Note that a lamp characteristics may rarely cause the brightness to fluctuate slightly.
• A lamp is consumable item. If used for extended periods, images will appear dark, and the lamp
could burn out. This is characteristic of a lamp, and is not malfunction. (The lifetime of the lamp
depends on conditions of use.)
• The DMDTM is made using extremely advanced technology, but there may be black spots (pixels
that do not light) or bright spots (pixels that are constantly lit) on the panel. Please note that these
are not malfunctions.
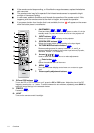
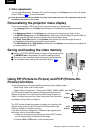
1. Use the zoom ring to adjust the projected
image to the size you need.
2. Then sharpen the image by rotating the
focus ring.
p.26