Network Scanning (Using Templates)
WorkCentre 7425/7428/7435
System Administrator Guide
113
Multifunction Printer Authentication
If using a SMARTsend server, a valid Windows account must be created on the SMARTsend Server for
the printer's authentication. The account enables each device to communicate with the SMARTsend
server to exchange template information and other configuration data. For account creation
instructions, refer to the FreeFlow SMARTsend Installation and Administration Guide.
Template Considerations when using SMARTsend
A single Xerox printer cannot use both CentreWare Network Scanning services and SMARTsend. If
legacy CentreWare Network Scanning Services templates need to be utilized within SMARTsend, use
the SMARTsend Template Importer to import the desired templates, as stated in the FreeFlow
SMARTsend Installation and Administration Guide.
Use of a Validation Server
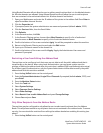
If you will be communicating with HTTPS to servers using SSL/TLS encryption, you can set the host
name and directory (which might be a cache on a Repeater) of the Validation Server used to validate
Digital Certificates over the enterprise network. To set these parameters, enter the IP Address of the
printer into your Web browser and press Enter. Click the Properties tab in CentreWare Internet
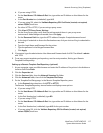
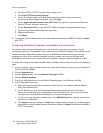
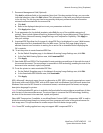
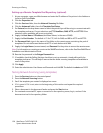
Services, then click the Services folder. Select Network Scanning, then Validation Server. Select HTTP
or HTTPS, enter the host name of the server, then enter the directory name (if required) specified by
the validation server manufacturer. Click Apply.
Installation Checklist
Please ensure that the following items are available or have been performed.
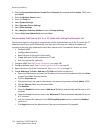
1. Ensure the printer is on and connected to a network.
2. Enable the purchased Scanning option. For instructions, see Enabling Options with Software Keys
on page 98. Contact your Xerox Sales Representative if you have not purchased the Scanning
option.
3. Ensure that the TCP/IP and HTTP protocols are configured on the printer and are fully functional.
This is required to access CentreWare Internet Services to configure Network Scanning.
To verify that the TCP/IP and HTTP protocols are correctly configured, print a Configuration Report.
For more information see Configuration Report on page 22.
To configure TCP/IP, see TCP/IP Protocol Configuration on page 43.
To enable HTTP, see Enabling Internet Services (HTTP) on page 23.
4. Ensure that the FTP Client and SMB port are enabled on the printer. To verify this, print a
Configuration Report.
To enable FTP and SMB, see Scan to PC (FTP/SMB) on page 121.
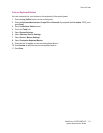
5. Note that after configuring a scan filing location (file repository) you need to create at least one
template for users to select to scan their documents to the pre-configured repository.


