


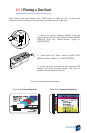

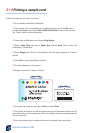
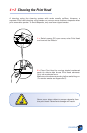
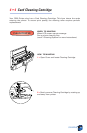

PRINTING A SAMPLE CARD
22
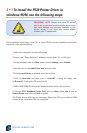
3 • 1 To install the P520 Printer Driver in
windows 95/98, use the following steps:
IMPORTANT NOTE: Ensure that your PC printer
port is set to standard mode and also ensure that
you have deleted any previous versions ot this
printer driver. If you have any doubts please
contact your IT department.
This installation uses floppy drive “A” or from CD Rom as the installation drive with
the printer used as stand alone.
❐ Start your computer and then Windows.
❐ Insert your “Zebra Software” diskette into the drive “A” or CD drive.
❐ Under windows click the Start button, select Settings, then Printers.
❐ Double click on the Add Printer icon and also Next.
❐ Ensure Local Printer is selected and click on Next.
❐ Click on Have disk and then type in “A:\win95” if using the floppy disc
or“
D:\win95” if using the CD and click OK.
❐ P520 CARD PRINTER should be displayed after which click on Next.
❐ Choose LPT1: Standard Printer Port, click on Next, select Yes to set as
Default Printer and click on Finish to install.
The Printer wizard will copy the necessary files to the PC for you and the P520
printer driver installation will be completed.