


ZyWALL 50 Internet Security Gateway
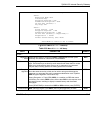
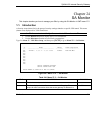
24-2 SA Monitor
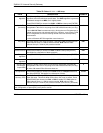
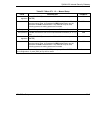
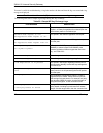
Table 24-1 Menu 27.2 — SA Monitor
FIELD DESCRIPTION EXAMPLE
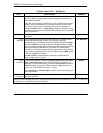
Name This field displays the identification name for this VPN policy. This name is
unique for each connection where the secure gateway IP address is a
public static IP address.
When the secure gateway IP address is 0.0.0.0 (as discussed in the last
chapter), there may be different connections using this the same VPN
rule. In this case, the name is followed by the remote IP address as
configured in Menu 27.1.1. – IPSec Setup. Individual connections using
the same VPN rule may be terminated without affecting other connections
using the same rule.
Taiwan
Encap.
This field displays Tunnel mode or Transport mode. See previous for
discussion.
Tunnel
IPSec
Algorithm
This field displays the security protocols used for an SA. ESP provides
confidentiality and integrity of data by encrypting the data and
encapsulating it into IP packets. Encryption methods include 56-bit DES
and 168-bit 3DES.An incoming SA may have an AH in addition to ESP.
The Authentication Header provides strong integrity and authentication by
adding authentication information to IP packets. This authentication
information is calculated using header and payload data in the IP packet.
This provides an additional level of security. AH choices are MD5 (default
- 128 bits) and SHA -1(160 bits).
Both AH and ESP increase ZyWALL processing requirements and
communications latency (delay).
ESP DES MD5
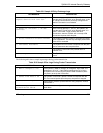
Select
Command
Press [SPACE BAR] to choose from Refresh, Disconnect, None, Next
Page, or Previous Page and then press [ENTER]. You must select a
connection in the next field when you choose the Disconnect command.
Refresh displays current active VPN connections. None allows you to
jump to the “Press ENTER to Confirm…” prompt.
Select Next Page or Previous Page to view the next or previous page of
rules (respectively).
Refresh
Select
Connection
Type the VPN connection index number that you want to disconnect and
then press [ENTER].
1
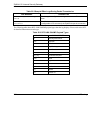
When you have completed this menu, press [ENTER] at the prompt “Press ENTER to Confirm…” to save your
configuration, or press [ESC] at any time to cancel.