A
BOUT
T
HIS
G
UIDE
Introduction
Your
SuperStack II Switch 3900 Getting Started Guide
provides all the information that you need to set up
your SuperStack
®
II Switch 3900 system and get it
operating in your network. This guide provides an
overview of your system and step-by-step procedures
for planning your configuration, installing your
system, cabling, powering up, configuring, and
troubleshooting. When you are ready to configure
your SuperStack II Switch 3900 system, see the
Administration Guide
on the Documentation CD.
If the information in the Software Installation and
Release Notes that are shipped with your Switch 3900
system differs from the information in this guide,
follow the instructions in the Release Notes.
This guide is intended for the system or network
administrator who is responsible for installing and
managing network hardware. It assumes that you
have a working knowledge of local area network
(LAN) operations, but it does not assume prior
knowledge of 3Com’s Switch 3900 high-performance
networking equipment.
Most user guides and release notes are available in
Adobe Acrobat Reader Portable Document Format
(PDF) or HTML on the 3Com World Wide Web site:
http://www.3com.com
Finding Specific Information in This Guide
This table shows where to find specific information.
For information on Turn to
Best ways to use the Switch
3900 system
“System Features and Benefits”
on page 1-5
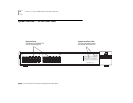
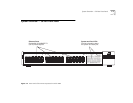
The front and back panels “System Overview — 24-Port
Front Panel” starting on page 1-2
Site requirements and other
issues to consider before
installing your Switch 3900
system
“General Safety Requirements” on
page B-1
Installing the system on a table
or in a distribution rack
“Installing the System on a Table
Top or in a Free-Standing Stack”
starting on page 2-2 and
“Installing the System in a
Distribution Rack” on page 2-3
Cabling rules and pin
assignments:
■
Fast Ethernet ports “Fast Ethernet Ports” on page 3-2
■
Gigabit Ethernet ports “Gigabit Ethernet Ports” on
page 3-4
■
Console port “Cabling the Console Port” on
page 3-5 and “Console Port Pin
Assignments” on page 3-7
Checking system power-up
diagnostics and LEDs
“Power Up” on page 4-2
(continued)


