21
2 Return to the device manager and repeat step 1 for the second bridge. Make
sure that both bridges are using the same BSSID.
If the bridges are not using the same BSSID, specify the BSSID on both bridges
as follows:
a In the Wireless Network page, select the following Network Mode: Ad-hoc
(Peer-to-Peer) Specify.
b Enter the BSSID in the spaces provided.
c Click Save.
3 After you have enabled RSSI broadcasting on both bridges and verified that
they are using the same BSSID, return to the device manager, select the first
bridge, and click Properties.
4 In the device properties window, click RSSI Monitor.
The RSSI Monitor window shows a graphical representation of bridge signal
strength. A value of 30 indicates good strength; a value of 40 or above is very
good. By adjusting the antenna position and orientation, you can improve the
signal strength.
SAVING CONFIGURATION CHANGES
Most pages in the configuration have two buttons: Save and Clear. After making
changes on a page, you must click Save to store the modifications before moving
to a new page.
If you make a mistake, click Clear before saving to restore the original
page settings.
To reduce the possibility of losing wireless association with an access point while
you are configuring, security settings are stored when you click Save in the
security pages, but they do not take effect until you click Save in the Wireless
Network page. First configure security settings. Then go to the Wireless
Network page and configure wireless network settings, including the Wireless
LAN Service Area. The security settings take effect after you click Save in the
Wireless Network page.
CHANGING SYSTEM PROPERTIES
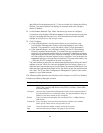
Under System Configuration, click System Properties. The System Properties page
displays the properties of the selected device. You can modify properties by
entering values in the fields and clicking the radio buttons. When you are
finished, click Save. The following table describes the properties and default
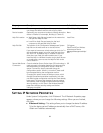
values.


