


3
USING THE
LOCAL CONFIGURATION MANAGER
Initializing the
IntelliJack
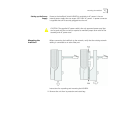
Once you have installed the NJ240FX hardware on your network and the Local
Configuration Manager software on your computer, you need to perform an
initial configuration of the IntelliJack.
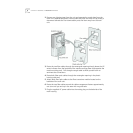
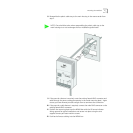
1 The first step is to connect your computer to the NJ240FX that you are installing.
Attach an Ethernet cable from a computer running the Local Configuration
Manager software to any one of the four personal area network (PAN) ports on
the front of the NJ240FX.
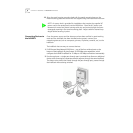
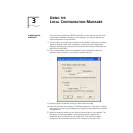
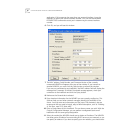
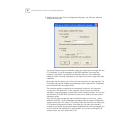
2 Click on the desktop shortcut icon labeled IJ Local Config Mgr to start the
program. When it launches, you will see a window like this:
3 Select the type of IntelliJack switch you would like to manage.
4 Enter the password for the device. The default password is “password” (without
the quotes). You will have the opportunity to specify a new password from within
this application.
5 Select the transport mode you are using to communicate on your network. The
IPv6 option will only be enabled if your operating system supports IPv6.
(IntelliJacks prior to NJ240FX do not support IPv6.) The Interface number
corresponds to the network interface in the computer running the LCM