


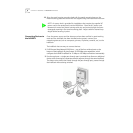
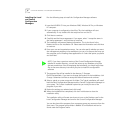

16 CHAPTER 3: USING THE LOCAL CONFIGURATION MANAGER
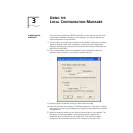
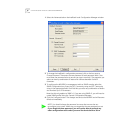
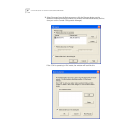
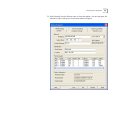
1 Select the Advanced tab on the IntelliJack Local Configuration Manager window.
2 To change the IntelliJack’s configuration password, click on the box next to
Change Password. Then enter the new password in both password fields. (You
must enter the password twice to ensure you type it correctly.) The password you
select can be any combination of letters and numbers between 8 and 32
characters.
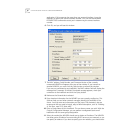
3 To configure the NJ240FX for management with an SNMP console, select the
SNMP Configuration box. Enter the GET Community string and SET Community
string in the appropriate fields. Each field lets you enter any combination of letters
and numbers up to 32 characters.
Note that this only applies to SNMP v1. If you are using SNMP v3, you will need to
create SNMP profiles using the Central Configuration Manager.
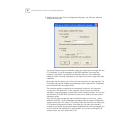
4 Click the Configure button. The changes are sent to the NJ240FX and will become
effective immediately.
NOTE: You should change the password to ensure that no one else can
re-configure your system. Make sure you remember the new password you set.
If you forget the new password, you will not be able to perform any
other configuration tasks unless you send the device back to 3Com.