


4 CHAPTER 1: INSTALLING THE NJ240FX INTELLIJACK
Before You Begin Before you begin installation, register your product at: http://eSupport.3com.com.
The IntelliJack is available in three connector types: -LC (3CRNJ240FXLCTAA-75),
-SC (3CRNJ240FXSCTAA-75), and -ST (3CRNJ240FXSTTAA-75). Before you begin
the installation, familiarize yourself with the following items, which are included
with the IntelliJack:
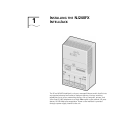
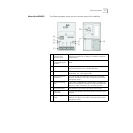
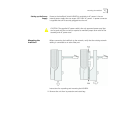
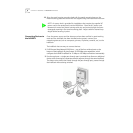
• NJ240FX IntelliJack.
• Mounting plate
• Plastic cable housing tray
• Power cord
• Three screws
• Compact disc containing
n User Guide and additional informational documents.
n Configuration Manager software.
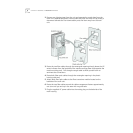
Planning the Installation Because the depth of some wall and cubicle openings differ, observe the following
requirements and recommendations before installing the IntelliJack:
• Ensure there is enough volume in the wall opening to accommodate fiber
cables.
• Ensure there is clearance around the unit for proper cooling.
• The NJ240FX has been designed for installation into wall or cubicle openings
that conform to NEMA standards.
• Make sure the distance between the back of the IntelliJack and the inside of
the wall or cubicle opening is at least 25mm to maintain an acceptable bend
radius on the cable.
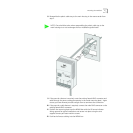
• To ensure proper horizontal cabling functionality, adhere to the following
standards during installation:
n ANSI/TIA/EIA-568
Commercial Building Telecommunications Cabling Standard
n ANSI/TIA/EIA-569
Commercial Building Standard for Telecommunications Pathways and
Spaces
The network cabling at your site (from the wiring closet to the wall or cubicle
opening) may already be installed. If it is not, install the cabling following these
general guidelines.
NOTE: It is recommended that a professional cable installer perform these
procedures. Be sure to adhere to local safety and regulatory codes during the
cable installation.