


18 CHAPTER 4: USING THE CENTRAL CONFIGURATION MANAGER
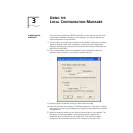
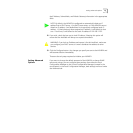
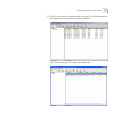
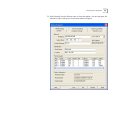
1 When you launch the Central Configuration Manager, you will see a welcome
window like this one:
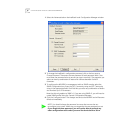
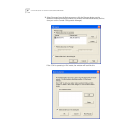
You should select the type of IntelliJack switch you would like to manage with the
CCM software. If you are managing an NJ240FX IntelliJack, then enter the
password (“password” by default) you specified when you first installed the
IntelliJack switch. Entering a password is not required to communicate with other
IntelliJacks.
Next select the IP transport you will use for communication on your network. The
IPv6 option will only be enabled your operating system supports IPv6. (IntelliJacks
prior to NJ240FX do not support IPv6.)
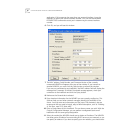
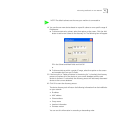
The interface number corresponds to the network interface in the computer
running the CCM application. If this computer has more than one network
interface, it may be necessary to specify the correct interface number. You can use
the Windows IPCONFIG DOS command to assist you in determining the correct
interface number.
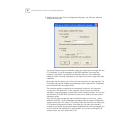
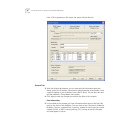
The CCM can only manage one type of IntelliJack switch at a time (i.e., either
NJ240FX or NJ220). To switch between managing these two types of IntelliJacks
without exiting the CCM, select CCM Settings from the View menu to display the
CCM session configuration window. From here you can make the necessary
changes. If you decide to change the type of IntelliJack that is being managed, you
must re-discover the IntelliJacks on your network. If you want to change the IP
transport used, you must restart the CCM.