Windows Peer-to-Peer
67
Control Panel Configuration
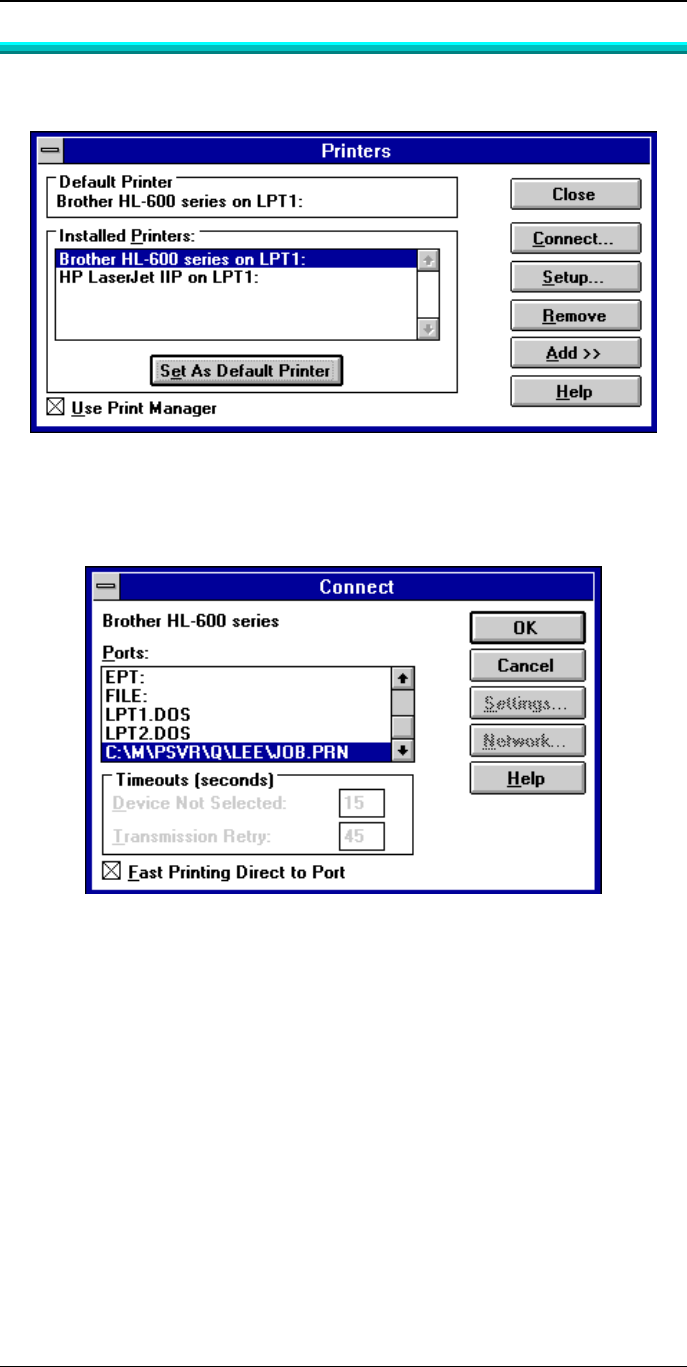
1. Go to Control Panel and invoke the Printers icon. The following Printer
dialogue box will appear:
Figure 25 Control Panel - Printers (WfW)
2. Follow the normal process to add each printer that is attached to the Print Server.
3. The printers must be associated with the print queue they will service. Click the
Connect button and the following Connect dialogue box will appear:
Figure 26 Printer Connect (WfW)
4. From the Ports list, select the queue which services the Print Server port to
which the printer is connected.
5. Repeat steps 3 & 4 to associate each printer with a queue.
6. Setup is complete. Now whenever you select Windows Print Setup, the printer
and its queue will appear in the printer list as shown in the example below.


