


111
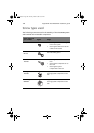
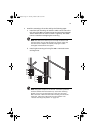
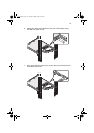
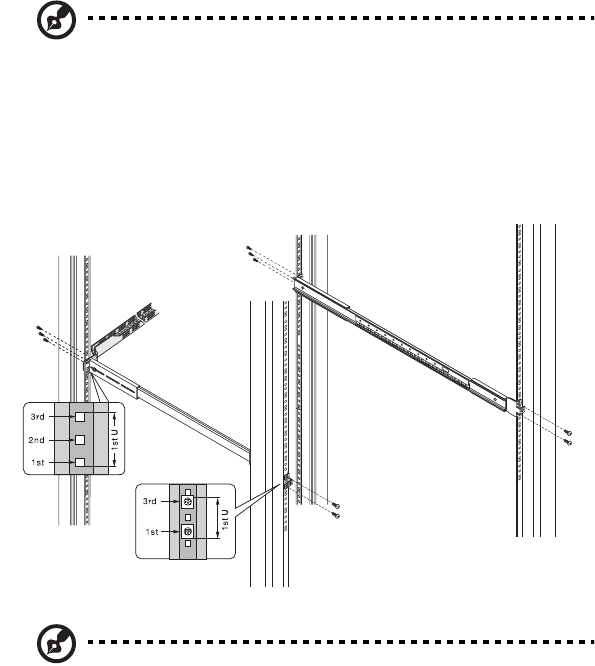
3 Install the mounting rails to the rack by the following steps:
a Install the left mounting rail with the cable carrier first to the
rack using five M6 x L10 metal screws and cage nuts (see page
109 for instructions on how to install a cage nut). The cable
carrier is installed overlapping the mounting.
Note: The cable carrier allows you to tie-wrap all cables to and
from the system. As you slide the system in and out of the rack,
the cable carrier collapses and extends, keeping the cables
untangled and attached to the system.
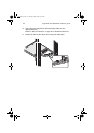
b Install right mounting rail using five M6 x L10 metal screws
and cage nuts.
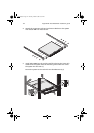
Note: The system occupies 1U in the rack. Count the U positions
and hole numbers from the bottom up. Secure the mounting
bracket on the 1st and the 2nd holes of the 1st U using four
M6 x L10 screws. Make sure that both mounting rails are at the
same level. Take note of the vertical rail hole pattern. See
“Vertical mounting hole pattern” on page 107.
aa r300.book Page 111 Tuesday, March 4, 2003 9:39 AM