


3 Upgrading your system48
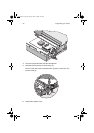
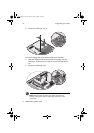
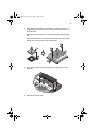
4 Loosen the two screws that hold the heatsink to the heatsink base
(1) then flip the clips outward (2). Remove the heatsink (3).
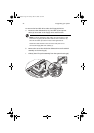
Gently press the socket lever down and slightly outward (4) then
pull it up to a 90° angle (5).
Carefully remove the CPU (6).
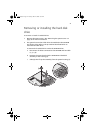
Installing the CPU
Before you proceed make sure that there is no CPU installed in the CPU
socket. Follow the steps below to install a CPU:
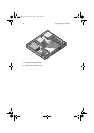
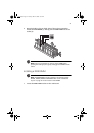
1 Locate the CPU socket on the mainboard.
2 Raise the socket lever up to a 90° angle.
aa r300.book Page 48 Tuesday, March 4, 2003 9:39 AM