59
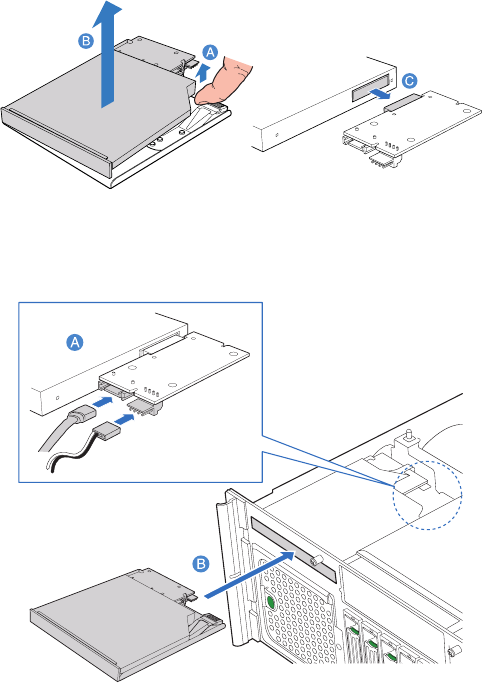
3 Lift the rear right corner of the media device to remove it from the
carrier (A) and (B).
4 Remove the SATA-to-IDE converter board (C).
5 Remove the new drive from its protective packaging.
6 Attach the SATA-to-IDE converter board to the media device.
7 Install a new media device into the carrier.
8 Slide the carrier into the front opening in the chassis.
9 Plug the SATA and power cables into the converter board.
10 Observe the post-installation instructions described on page 34.


