


3 System upgrade
68
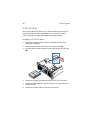
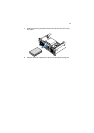
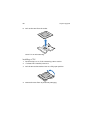
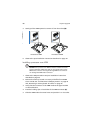
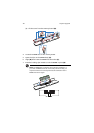
5 Gently pull the VRM upward to remove it from the socket (B).
6 Observe the post-installation instructions described on page 34.
Installing a processor core VRM
Caution! The processor core VRM connector is slotted to ensure
proper installation. Make sure that you are inserting the correct
VRM to the connector. Forcing the wrong VRM into a connector
can damage the VRM and/or connector.
1 Observe the ESD precautions and pre-installation instructions
described on page 33.
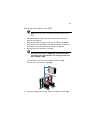
2 Remove the memory boards or memory air baffles from DIMM
slots C and D. See “Cold Removal of Memory Board” on page 70
and “Removing a memory board air baffle” on page 42.
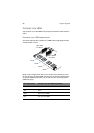
3 Verify that the connector of the VRM matches the type installed
on the mainboard.
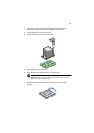
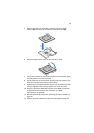
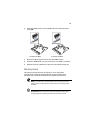
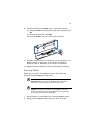
4 Press the holding clips on both sides of the VRM connector (A).
5 Slide the VRM under the center brace and position it on its socket.
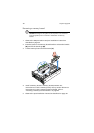
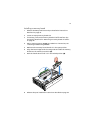
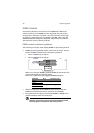
Processor 3 VRM
Processor 4 VRM