


Installing the Wireless Router
8
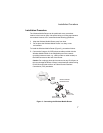
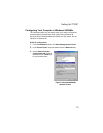
2. Connect power to the Wireless Mobile Router as follows:
Mobile - connect one end of the USB power cable (provided) to the
Router power connector. Connect the other end of the USB cable to
the USB connector on the notebook computer being used, or to the
TravelPower
®
Adapter (if using APC’s TravelPower Case).
Home Office/Small Business - connect the AC power adapter
(provided) to the Wireless Mobile Router. Connect the AC power
adapter to an AC power source (wall outlet, APC surge protector,
DC/AC inverter, etc).
Rotate both antennas on the side of the Wireless Mobile Router to the
desired position. For more effective coverage, position antennas along
different axes; for example around 45 to 90 degrees apart. Try to place
the Wireless Mobile Router in a position that is located in the center of
the wireless network. Normally, the higher the antenna is placed,
the
better the performance. Ensure the Wireless Mobile Router location
provides optimal reception throughout the home or office.
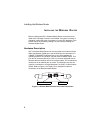
Computers equipped with a wireless adapter can communicate with
each other as an independent wireless LAN by configuring each
computer to the same radio channel. However, the Wireless Mobile
Router can provide access to the wired/wireless LAN or to the Internet
for all wireless workstations. Each wireless PC in this network
infrastructure can talk to any computer in the wireless group via a radio
link, or access other computers or network resources in the wired LAN
infrastructure or over the Internet via the Wireless Mobile Router.
The wireless infrastructure configuration not only extends the
accessibility of wireless PCs to the wired LAN, but also increases the
effective wireless transmission range for wireless PCs by retransmitting
incoming radio signals through the Wireless Mobile Router.
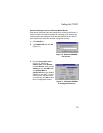
Ensure that the clients are configured to the same SSID (default: APC),
and that encryption and wireless communication are configured.
For additional information about SSID and encryption, refer to the
“Advanced Setup” section in this manual.