


40
VSI-Pro VIDEO SERIAL INTERFACE
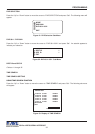
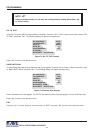
ALARM TRIGGER
Choices: 1, 2, 3, 4, 5, 6, 7, 8, 9, 10, 11, 12, 13, 14, 15, 16, 17, 18, 19, 20, 21, 22, 23,24 , 1-12, 13-24, 1-24
An Alarm Trigger is the source of activity programmed to activate a certain alarm. The alarm trigger tells the VSI-Pro
what exception to use to trigger the alarming device or the on-screen flag.
Choices: Exceptions 1, 2, 3, 4, 5, 6, 7, 8, 9, 10, 11, 12, 13, 14, 15, 16, 17, 18, 19, 20, 21, 22, 23, and 24 (alarms when
data is received that matches what you have set in these exception strings).
Exceptions 1-12: alarms when data is received that matches any data set in Exception 1-12.
Exceptions 13-24: alarms when data is received that matches any data set in Exception 13-24.
Exceptions 1-24: alarms when data is received that matches any data set in Exception.
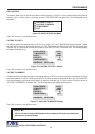
RTS
External alarm input. The VSI-Pro has 1 alarm input, if you are not using the handshaking function. A contact
closure to ground on pin 7 (pin 5 is ground) will trigger this alarm. Coupled with the RTS Triggered text, you can now
display a 40 character message from an external alarm input.
1
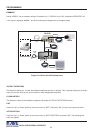
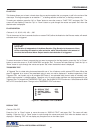
RTS APPLICATION NOTE
The RTS alarm input can be connected to a timer on the drawer of a cash register to alarm
and send the message "DRAWER OPEN" to the screen if the drawer is open too long.
To select the alarm trigger that you want to program, press the “Up” or “Down” button to move the cursor to “ALARM
TRIGGER” and press “Set”. The cursor will start flashing. Press the “Up” or “Down” button to cycle through the
values and press “Set” when the desired value is displayed.
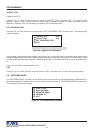
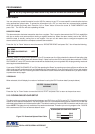
NORMAL STATE
Choices: NO (Normally open), NC (Normal closed)
There are two choices: NO (normally open) or NC (normal closed). These selections determine whether the alarm
outputs will act as a normally open switch or a normally closed switch.
To select the Normal State that you want to program, press the “Up” or “Down” button to move the cursor to “NORMAL
STATE” and press “Set”. The cursor will start flashing . Press the “Up” or “Down” button to cycle through the values
and press “Set” when the desired value is displayed.
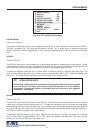
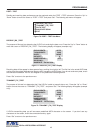
ALARM DURATION
This is the amount of time in seconds that the alarm will remain activated once it is triggered. The selections for alarm
duration are: PULSE, 6, 12, 20, 30, 60, 120, 180, and 300 seconds. (PULSE sends a 200mS alarm pulse to the alarm
device.)
To select the amount of time in seconds that you want to program the alarm duration, press the “Up” or “Down” button
to move the cursor to “ALARM DURATION” and press “Set”. The cursor will start flashing. Press the “Up” or “Down”
button to cycle through the values and press “Set” when the desired value is displayed.
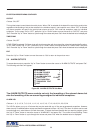
PROGRAMMING