


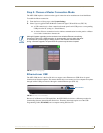


Configuring Communication
39
MVP-5200i Modero Viewpoint Widescreen Touch Panel
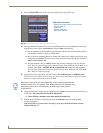
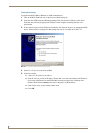
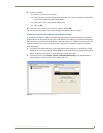
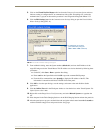
5. In the new window:
Select Use the following IP Address.
Under IP address, provide an IP address (ensure that it is in the same subnet as the IP address
given to the usb0 interface on the MVP-5200i).
Under Subnet mask, set the suitable subnet mask.
Click on OK'
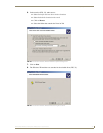
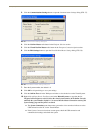
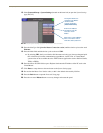
6. In the Local Area Connection 3 Properties window, click on OK.
The user should now be able to run any TCP/IP application between the two systems.
Configure a Virtual NetLinx Master using NetLinx Studio
A Virtual NetLinx Master (VNM) is used when the target panel is not actually connected to a physical
NetLinx Master. In this situation, the PC takes on the functions of a Master via a Virtual NetLinx Master.
This connection is made by either using the PC’s Ethernet Address (via TCP/IP using a known PC’s IP
Address as the Master) or using a direct mini-USB connection to communicate directly to the panel.
Before beginning:
1. If using the mini-USB connection, verify the panel has been configured to communicate via USB
within the System Settings page and that the USB driver has been properly configured. Changing the
Master Connection type requires a reboot before the change takes effect.
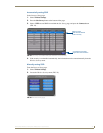
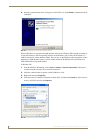
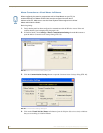
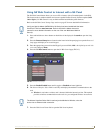
2. In NetLinx Studio, select Settings > Master Communication Settings, from the Main menu to
open the Master Communication Settings dialog (FIG. 36).
FIG. 36 Master Communications Settings dialog box