Chapter 3: Basic Operations 39
To confi gure an email action:
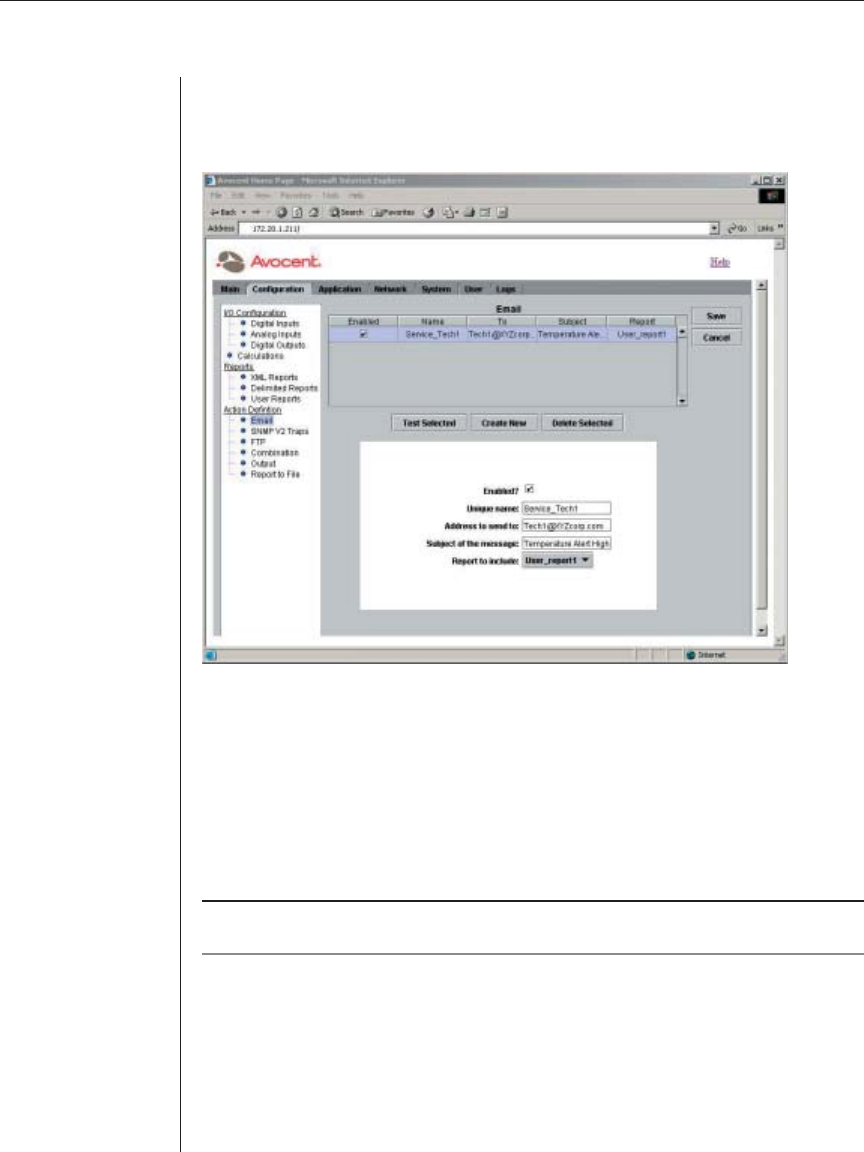
1. After launching the web GUI, click Confi guration - Email. The Email
window displays a list of existing email actions confi gured in the system.
Figure 3.17: Email Window
2. Click the row displaying the email action you want to edit.
- or -
Click the Create New button to add a new email action. A new row is
added to the Email table.
The email action information displays in the dialog box.
3. Click the Enabled checkbox to enable the email action.
NOTE: An enabled email action is available for use in the following operations: Combination
actions, Thresholds, Rules and Timed Rules.
4. Type a new name for the email action in the Unique name fi eld. The name
cannot contain any spaces, and the only special character allowed is
the underscore (_).
5. Type the recipient’s email address in the Address to send to fi eld. Only one
email address is allowed per entry.
6. Type the subject of the email message in the Subject of the message fi eld.
