


english deutsch francais
20
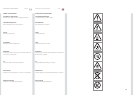
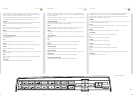
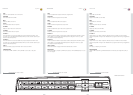
KEYPAD TASTENFELD CLAVIER
20
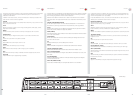
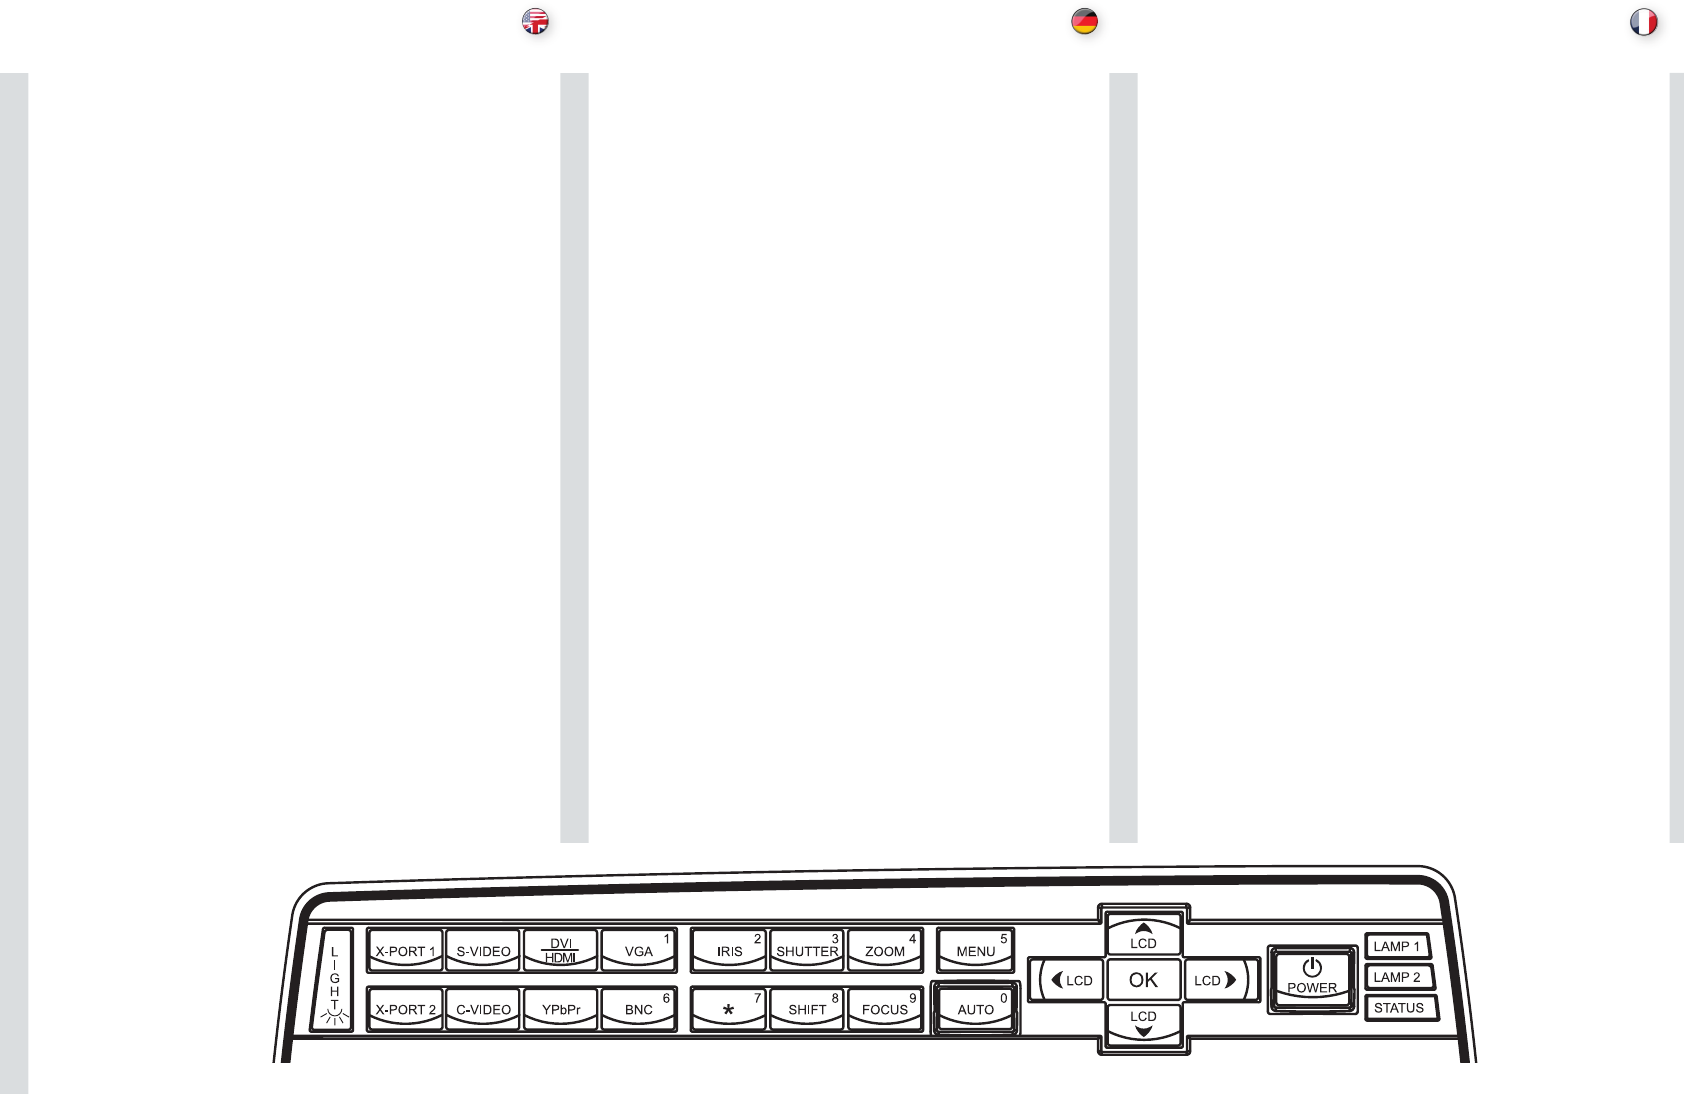
The keypad is illuminated for operation in dark environments. Available functions are illuminated
in yellow while selected (active) functions are illuminated in green. Functions that are not
available are not illuminated.
In addition to the various functions, 10 keys are numbered 0-9. These keys are used for PIN
code and other numeric functions as applicable.
POWER
Switches the projector between on and standby modes. Press firmly (1 sec) to switch on. Press
firmly (1 sec) twice to switch off.
AUTO
Adjusting the projector to display a correct image, including position, width, height, contrast,
brightness and overall stability.
MENU
Activates the menu system. Use the four arrow keys to navigate and «OK» to activate.
ARROW KEYS
Use the arrow keys to navigate the menu system or to control lens and LCD functions.
OK
Confirm menu option when menu system is activated.
ZOOM
Select ZOOM, then use arrow keys to zoom in or out.
FOCUS
Select FOCUS, then arrow keys to focus the image
SHIFT
Select SHIFT, then the arrow keys to shift the image up, down or sideways.
IRIS
Select IRIS, then arrow keys to adjust to desired combination of brightness and contrast.
SHUTTER
Press SHUTTER to stop the projected image completely.
Das Tastenfeld ist für seine Betätigung bei Dunkelheit beleuchtet. Die zur Verfügung stehenden
Funktionen sind gelb beleuchtet, während die gewählten (aktiven) Funktionen grün leuchten.
Nicht zur Verfügung stehende Funktionen sind nicht beleuchtet.
Neben den verschiedenen Funktionen sind 10 Tasten mit den Nummern 0 bis 9 versehen.
Diese Tasten dienen zur Eingabe des PIN-Codes und für andere Nummernfunktionen je nach
Bedarf.
POWER (STROMVERSORGUNG)
Schaltet den Projektor zwischen an und den Standby-Betriebsarten um. Drücken Sie zum
Einschalten fest (1 Sek. lang). Drücken Sie zum Ausschalten fest (1 Sek. lang) zwei Mal.
AUTO
Einstellung des Projektors, damit das Bild korrekt angezeigt wird; dazu gehören die Position,
Breite, Höhe, Kontrast, Helligkeit und allgemeine Stabilität.
MENU (MENÜ)
Öffnet das Menüsystem. Mit den Pfeiltasten können Sie die verschiedenen Elemente erreichen
und mit «OK» dann aktivieren.
PFEILTASTEN
Mit Hilfe der Pfeiltasten können Sie sich durch das Menüsystem bewegen oder die Linsen-
und LCD-Funktionen steuern.
OK
Bestätigt eine Menüoption, wenn das Menüsystem aktiviert ist.
ZOOM
Wählen Sie ZOOM und vergrößern bzw. verkleinern Sie das Bild mit den Pfeiltasten.
FOCUS (SCHARFSTELLUNG)
Wählen Sie SCHARFSTELLUNG und stellen Sie das Bild mit den Pfeiltasten scharf
SHIFT (VERSCHIEBUNG)
Wählen Sie VERSCHIEBUNG und verlagern Sie das Bild mit den Pfeiltasten nach oben, unten
bzw. seitlich
IRIS (IRISBLENDE)
Wählen Sie IRISBLENDE und stellen Sie mit Hilfe der Pfeiltasten die gewünscht Helligkeits-
und Kontrastkombination ein.
SHUTTER (VERSCHLUSS )
Drücken Sie auf VERSCHLUSS, um das Projektorbild vollkommen zu unterbinden.
Le clavier est lumineux pour utilisation dans un lieu sombre. Les fonctions disponibles sont
éclairées en jaune alors que les fonctions sélectionnées (actives) sont éclairées en vert. Les
fonctions non disponibles ne sont pas éclairées.
En plus des différentes fonctions, 10 touches sont numérotées de 0 à 9. Ces touches sont
utilisées pour le code PIN et d’autres fonctions numériques.
POWER (PUISSANCE)
Alternez le projecteur entre les modes on et veille. Appuyez fermement (1 sec) pour allumer.
Appuyez 2 fois fermement (1 sec) pour éteindre.
AUTO
Réglage du projecteur pour donner une image correcte, en ce qui concerne la position, la
largeur, la hauteur, le contraste, la brillance et la stabilité d’ensemble.
MENU
Active le menu. Utilisez les quatre touches flèche pour parcourir et la touche OK pour activer.
TOUCHES FLECHE
Utilisez les touches flèche pour parcourir le menu ou pour les fonctions de commande de
l’objectif et du LCD.
OK
Confirme l’option du menu quand le menu est activé.
ZOOM
Choisissez ZOOM , puis utilisez les touches flèche pour zoomer en avant ou en arrière.
FOCUS (MISE AU POINT)
Choisissez FOCUS, puis utilisez les touches flèche pour faire la mise au point de l’image.
SHIFT (DECALAGE)
Sélectionnez SHIFT, puis utilisez les touches flèche pour décaler l’image vers le haut, vers le
bas ou sur les côtés.
IRIS
Sélectionnez IRIS, puis utilisez les touches flèche pour ajuster la combinaison souhaitée de
luminosité et de contraste.
SHUTTER
Appuyez sur SHUTTER pour stopper complètement la projection d’image.
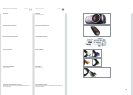
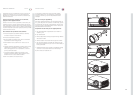
UHP lamp