25
Ch. 2 Getting Started
Getting Started
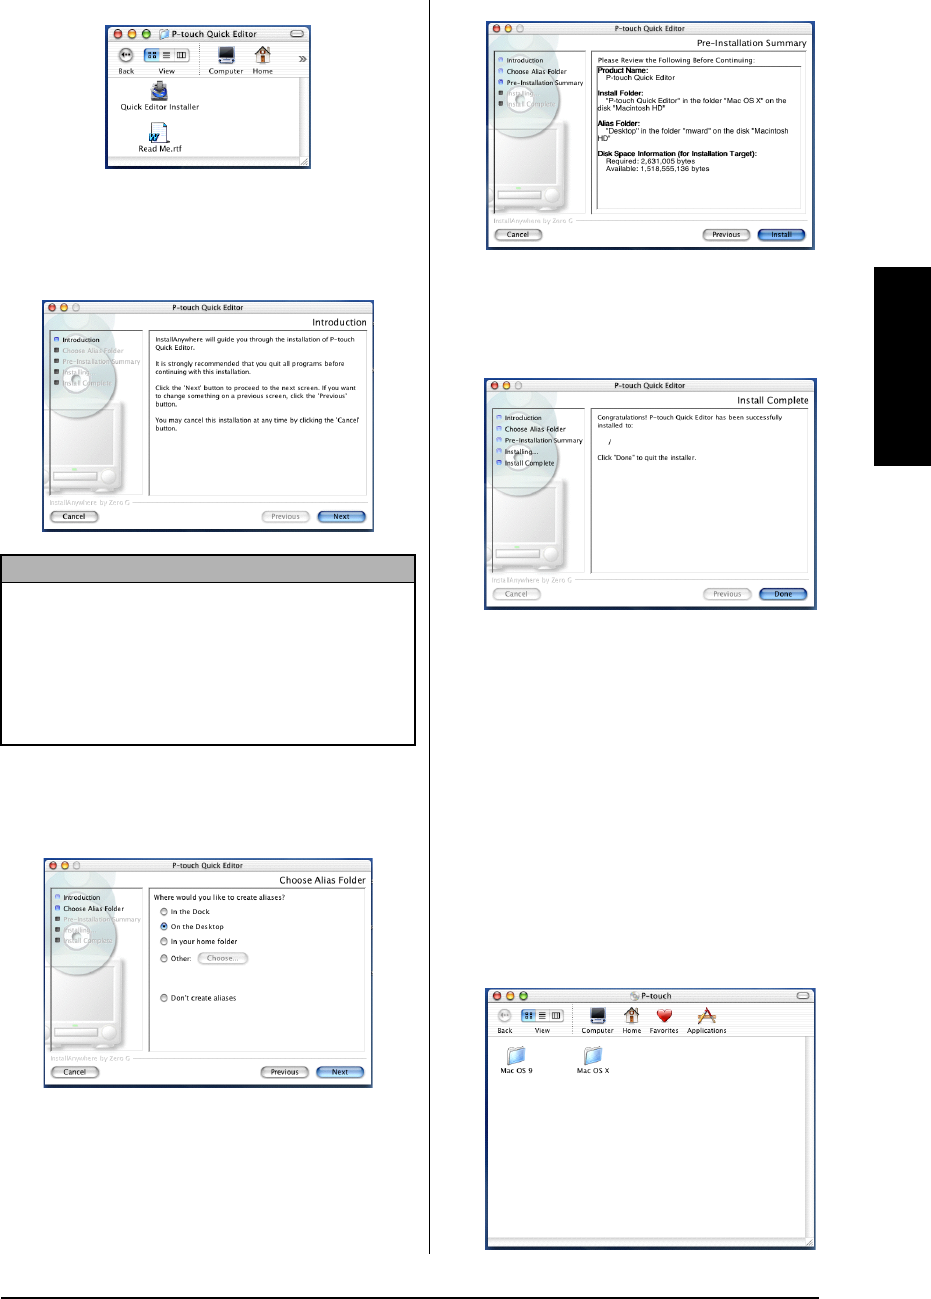
6 Double-click the P-touch Quick Editor
Installer icon in the folder that appears. The
installer starts up, and then the Introduction
dialog box appears.
7 Click the Next button. The Choose Alias
Folder dialog box appears, allowing you to
select where an alias to P-touch Quick Edi-
tor will be added.
8 Select the desired location for the alias, and
then click the Next button. A dialog box
appears, allowing you to check the installa-
tion.
9 Check that the installation will be per-
formed as desired, and then click the Install
button. After P-touch Quick Editor is
installed, a dialog box appears, indicating
that the installation is finished.
0 Click the Done button, and then restart the
computer.
Installing the printer driver
(MAC OS X 10.1 to 10.2.3)
To install the printer driver:
1
With the P-touch and the Macintosh turned off,
connect the P-touch to the computer using the
enclosed USB interface cable as described on
page 9. Be sure to leave the P-touch turned off.
2 Turn on the Macintosh.
3 Insert the enclosed CD-ROM into the com-
puter’s CD-ROM drive.
NOTE
When the Next button is pressed, a message may
appear, warning that an older version of the soft-
ware is installed. Be sure to uninstall the older ver-
sion of the software before trying to install the new
software. For details on uninstalling the software,
refer to To uninstall the P-touch Quick Editor soft-
ware: on page 37.
