9-8
Cisco ASA Series Firewall CLI Configuration Guide
Chapter 9 Getting Started with Application Layer Protocol Inspection
Configuring Application Layer Protocol Inspection
You can specify a match access-list command along with the match default-inspection-traffic
command to narrow the matched traffic to specific IP addresses. Because the match
default-inspection-traffic command specifies the ports to match, any ports in the ACL are ignored.
Tip We suggest that you only inspect traffic on ports on which you expect application traffic; if you
inspect all traffic, for example using match any, the ASA performance can be impacted.
If you want to match non-standard ports, then create a new class map for the non-standard ports. See the
“Default Settings and NAT Limitations” section on page 9-4 for the standard ports for each inspection
engine. You can combine multiple class maps in the same policy if desired, so you can create one class
map to match certain traffic, and another to match different traffic. However, if traffic matches a class
map that contains an inspection command, and then matches another class map that also has an
inspection command, only the first matching class is used. For example, SNMP matches the
inspection_default class. To enable SNMP inspection, enable SNMP inspection for the default class in
Step 5. Do not add another class that matches SNMP.
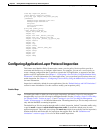
For example, to limit inspection to traffic from 10.1.1.0 to 192.168.1.0 using the default class map, enter
the following commands:
ciscoasa(config)# access-list inspect extended permit ip 10.1.1.0 255.255.255.0
192.168.1.0 255.255.255.0
ciscoasa(config)# class-map inspection_default
ciscoasa(config-cmap)# match access-list inspect
View the entire class map using the following command:
ciscoasa(config-cmap)# show running-config class-map inspection_default
!
class-map inspection_default
match default-inspection-traffic
match access-list inspect
!
To inspect FTP traffic on port 21 as well as 1056 (a non-standard port), create an ACL that specifies the
ports, and assign it to a new class map:
ciscoasa(config)# access-list ftp_inspect extended permit tcp any any eq 21
ciscoasa(config)# access-list ftp_inspect extended permit tcp any any eq 1056
ciscoasa(config)# class-map new_inspection
ciscoasa(config-cmap)# match access-list ftp_inspect
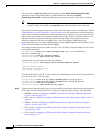
Step 2 (Optional) Some inspection engines let you control additional parameters when you apply the inspection
to the traffic. See the following sections to configure an inspection policy map for your application:
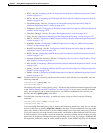
• DCERPC—See the “Configuring a DCERPC Inspection Policy Map for Additional Inspection
Control” section on page 13-2
• DNS—See the “(Optional) Configuring a DNS Inspection Policy Map and Class Map” section on
page 10-3
• ESMTP—See the “Configuring an ESMTP Inspection Policy Map for Additional Inspection
Control” section on page 10-33
• FTP—See the “Configuring an FTP Inspection Policy Map for Additional Inspection Control”
section on page 10-12.
• GTP—See the “Configuring a GTP Inspection Policy Map for Additional Inspection Control”
section on page 13-4.


