1-12
Cisco ASA Series Firewall CLI Configuration Guide
Chapter 1 Configuring a Service Policy Using the Modular Policy Framework
Identifying Traffic (Layer 3/4 Class Maps)
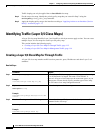
Traffic shaping can only be applied the to class-default class map.
Step 4 For the same class map, identify the priority policy map that you created in Step 2 using the
service-policy priority_policy_map command.
Step 5 Apply the shaping policy map to the interface accrding to “Applying Actions to an Interface (Service
Policy)” section on page 1-17.
Identifying Traffic (Layer 3/4 Class Maps)
A Layer 3/4 class map identifies Layer 3 and 4 traffic to which you want to apply actions. You can create
multiple Layer 3/4 class maps for each Layer 3/4 policy map.
This section includes the following topics:
• Creating a Layer 3/4 Class Map for Through Traffic, page 1-12
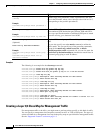
• Creating a Layer 3/4 Class Map for Management Traffic, page 1-14
Creating a Layer 3/4 Class Map for Through Traffic
A Layer 3/4 class map matches traffic based on protocols, ports, IP addresses and other Layer 3 or 4
attributes.
Detailed Steps
Command Purpose
Step 1
class-map class_map_name
Example:
ciscoasa(config)# class-map all_udp
Creates a Layer 3/4 class map, where class_map_name is a string
up to 40 characters in length. The name “class-default” is
reserved. All types of class maps use the same name space, so you
cannot reuse a name already used by another type of class map.
The CLI enters class-map configuration mode.
Step 2
(Optional)
description string
Example:
hostname(config-cmap)# description All UDP
traffic
Adds a description to the class map.
Step 3
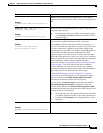
Match traffic using one of the following: Unless otherwise specified, you can include only one match
command in the class map.
match any
Example:
hostname(config-cmap)# match any
Matches all traffic.


