


3-7
Cisco IAD2430 Series Integrated Access Devices Hardware Installation Guide
OL-4234-06
Chapter 3 Installing Cisco IAD2430 Series IADs
Rack-Mounting the Chassis
Mounting Screws
Two sets of mounting screws are provided, in separate packages (Mounting screws are not included with
the Cisco IAD2435 IAD chassis). Take care to use each screw type, and washers as needed, in the
appropriate locations.
Table 3-1 clarifies the differences between rack-mounting and wall-mounting
screws.
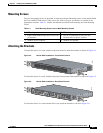
Attaching the Brackets
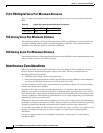
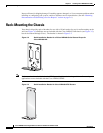
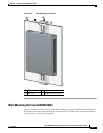
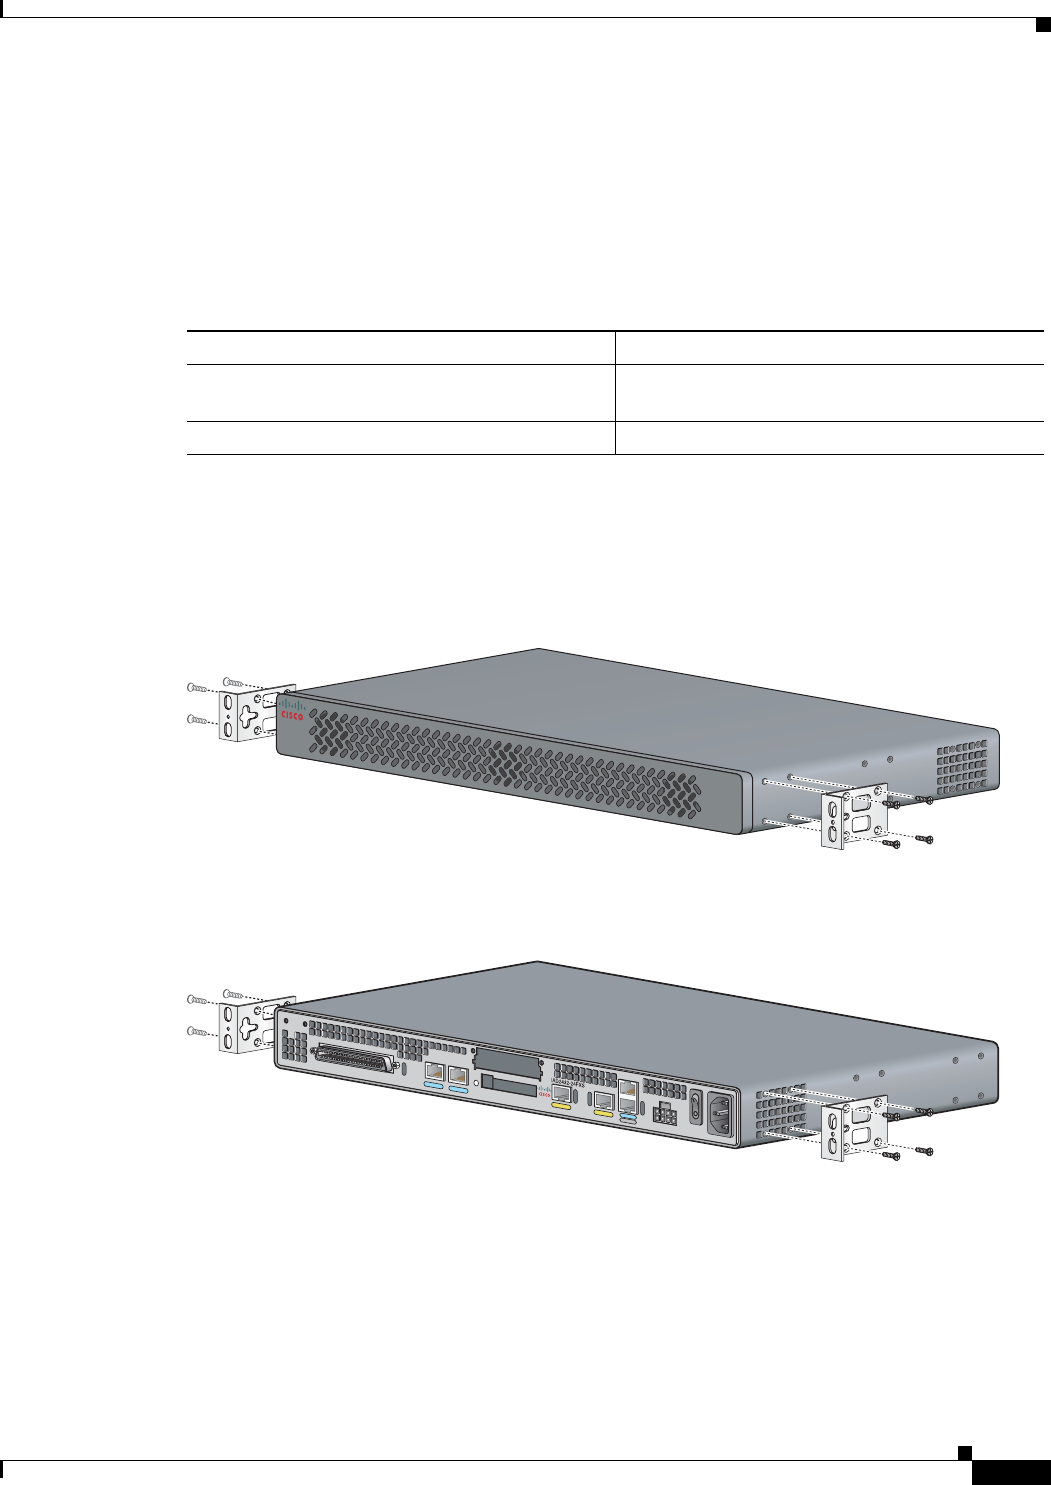
To install the chassis in a rack with the front panel forward, attach the brackets as shown in Figure 3-4.
Figure 3-4 19-Inch Rack Installation—Front Panel Forward
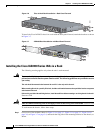
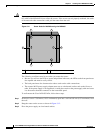
To install the chassis in a rack with the back panel forward, attach the brackets as shown in Figure 3-5.
Figure 3-5 19-Inch Rack Installation—Back Panel Forward
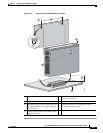
To install the chassis in a center-mount telco rack, attach the brackets as shown in Figure 3-6.
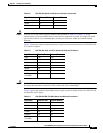
Ta b l e 3-1 Rack-Mounting Screws Versus Wall-Mounting Screws
Rack Mounting Wall Mounting
• Eight countersunk Phillips head screws (four
per bracket).
• Four 6–32 slotted hex screws (two per
bracket) and four plastic washers.
• Washers are not required. • Washers are required.
88840
CISC
O
IAD
2
40
0
88841