


3-10
Cisco IAD2430 Series Integrated Access Devices Hardware Installation Guide
OL-4234-06
Chapter 3 Installing Cisco IAD2430 Series IADs
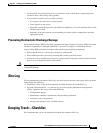
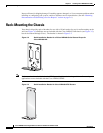
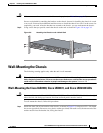
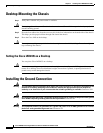
Wall-Mounting the Chassis
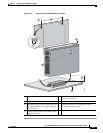
Caution Be sure to use the correct screws and plastic washers for this mounting option. (See Table 3-1 on
page 3-7.)
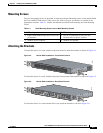
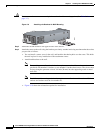
Figure 3-9 Attaching the Brackets for Wall-Mounting
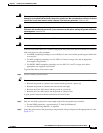
Step 2 Attach the second bracket to the opposite side of the chassis.
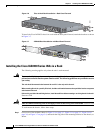
Step 3 Attach the router to the wall using the brackets previously attached and using attachment hardware that
you provide as follows:
• You can install a starter screw in the wall, and hook the bracket keyhole over the screw. This holds
the unit in place for easy installation of the attachment screws.
• Attach both brackets to the wall.
Note For attaching to a wall stud, each bracket requires two number 10 wood screws (round- or
pan-head) with number 10 washers, or two number 10 washer-head screws. The screws must
be long enough to penetrate at least 3/4-inch (20-mm) into the supporting wood or metal
wall stud.
Note For hollow-wall mounting, each bracket requires two wall anchors with washers. Wall
anchors and washers must be size number 10.
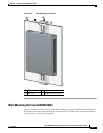
• Figure 3-10 shows the orientation required for installation.
88843