4-5
Cisco SFS InfiniBand Host Drivers User Guide for Linux
OL-12309-01
Chapter 4 SCSI RDMA Protocol
Configuring SRP
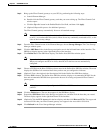
Step 9 Click the Next > button. The Define New SRP Host window displays a recommended WWNN for the
host and recommended WWPNs that represent the host on all existing and potential Fibre Channel
gateway ports.
Note Although you can manually configure the WWNN or WWPNs, we recommend that you use the
default values to avoid conflicts.
Step 10 Click Finish. The new host appears in the SRP Hosts display.
Step 11 Expand the SRP Hosts folder in the Storage navigation tree, and then click the host that you created.
The host display appears in the right-hand frame of the interface.
Step 12 Click the Targets tab in the host display. Double-click the WWPN of the target that you want your host
to access. The IT Properties window opens.
Step 13 Click the ... button next to the Port Mask field. The Select Port(s) window opens and displays two port
numbers for each slot in the chassis. The raised port numbers represent restricted ports. The pressed port
numbers represent accessible ports.
Step 14 Click the port(s) to which the SAN connects to grant the initiator access to the target through those ports,
and then click OK.
Step 15 Click the Apply button in the IT Properties window, and then close the window.
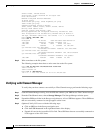
Step 16 Click the LUN Access tab in the host display, and then click Discover LUNs. The targets and associated
LUNs that your Fibre Channel gateway sees appear in the Available LUNs field.
Step 17 Click the LUN Access tab, click the target that you configured in Step 16, and then click Add >. The
target and its LUN(s) appear in the Accessible LUNs field in an Inactive ITLs folder.
Step 18 Click the LUN that you want your host to reach, and then click Edit ITL Properties. The ITL Properties
window opens.
Step 19 Click the ... button next to the Port Mask field. The Select Port(s) window opens and displays two port
numbers for each slot in the chassis. The raised port numbers represent restricted ports. The pressed port
numbers represent accessible ports.
Step 20 Click the port(s) to which the SAN connects to grant the initiator access to the target through those ports,
and then click the OK button.
Step 21 Click the Refresh button in the Cisco Storage Manager window.


