


2-12
Installation and Upgrade Guide for Cisco Unified MeetingPlace Web Conferencing Release 6.x
OL-13418-01
Chapter 2 Installing Web Conferencing
Postinstallation Tasks: Web Conferencing
MPConnect (0x14B0) Debug: Response: <?xml version="1.0" encoding="utf-8"?>
<results><status code="ok"/></results>
Step 7 Continue with the next section, “Postinstallation Tasks: Web Conferencing.”
Postinstallation Tasks: Web Conferencing
We recommend that you complete the following optional tasks as applicable after installing the web
conferencing software:
• Defining the Web Conferencing Server Hostname Information, page 2-12
• Testing the Web Conferencing Installation, page 2-13
• Installing the Cisco Security Agent for Cisco Unified MeetingPlace Web Conferencing, page 2-14
• Creating and Using a Least-Privileged SQL Account for Web Conferencing, page 2-14
• Configuring SSL, page 2-16
Defining the Web Conferencing Server Hostname Information
If you want users to be able to access the Web Conferencing server by using the fully qualified domain
name (FQDN) of the server, or if you plan to configure SSL for this server, do the following procedure.
Note If the web server is not in a Domain Name Server (DNS), do not perform this procedure.
To Define the Cisco Unified MeetingPlace Web Conferencing Server Hostname Information
Step 1 Open your web browser, and enter the URL of your web server.
For internal web servers, the default URL structure is http://<server>, where <server> is the name of
your internal web server.
For external web servers, the default URL structure is http://<server>/mpweb/admin/, where <server> is
the name of your external web server.
Step 2 When the Web Conferencing home page appears, sign in by using your System Manager-level user ID
and password, then click Sign In Now.
If you are on an internal web server, the Welcome page appears with your name displayed at the top. To
access the administrative page, click Admin.
If you are on an external web server, the administrative page appears.
Step 3 From the Admin page, click Web Server.
Step 4 From the View section of the page, click the name of the web server that you want to configure.
Information about this web server populates the Edit section of the page.
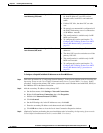
Step 5 For Hostname [Home Page], enter the fully qualified domain name (FQDN) of the primary network
interface on the web server, for example, hostname.domain.com. Note the following considerations:
• To use SSL, you must enter the FQDN.