


Copyright © 2006, Cognitive - 1.800.525.2785 70
105-169-03
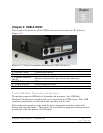
Chapter 6: Network Printing
Network-enabled printers can be connected directly to a network, providing the
flexibility of printing to the same printer from multiple workstations.
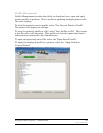
To configure the printer’s network settings, connect to the Administrator program
over a local USB or serial or parallel port. Refer to Chapter 4 for instructions on
connecting to the printer using a local port.
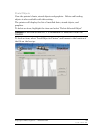
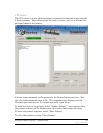
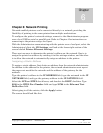
With the Administrator communicating with the printer over a local port, select the
Administrator’s first tab, I/O Settings, and look at the lower-right section of the
screen labeled Printer Ethernet Settings.
There are two ways to determine the printer’s address on the network. One is to
assign the printer an address by entering it in this settings window, and the other
is to allow the network to automatically assign an address to the printer.
Assigning a Static Address
To assign a static address, first obtain an address from the network administrator.
In addition to the address for the printer, the network administrator must report
the proper net mask for the network and the address of the gateway for the
network.
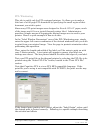
Type the printer’s address in the IP ADDRESS field, type the net mask in the IP
NET MASK field, and type the gateway address in the IP GATEWAY field.
Select the LPD and RTEL check boxes, and deselect the DHCP checkbox. Type
9100 in the RTEL Port Number field and type 32768 in the Ethernet Text
Buffer Size field.
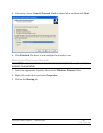
After typing in all the entries, click the Apply button.
The screen should look like this:
Chapter
6