


46 Setting Up and Using Your Computer
6
From the drop-down box, select
RAID 1
as the RAID level
.
NOTE: Select the hard drive that already has the data or operating system files that
you want to maintain on the RAID volume as your source hard drive.
7
On the
Select Source Hard Drive
screen, double-click the hard drive from
which you want to migrate, and click
Next
.
8
On the
Select Member Hard Drive
screen, double-click the hard drive to
select the member drive that you want to act as the mirror in the array, and
click
Next
.
9
On the
Specify Volume Size
screen, select the volume size you want, and
click
Next
.
NOTE: In the following step, you will lose all data contained on the member drive.
10
Click
Finish
to start migrating, or click
Back
to make changes. You can use
your computer normally during migration process.
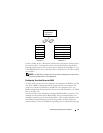
Creating a Spare Hard Drive
A spare hard drive may be created with a RAID 1 array. The spare hard drive
will not be recognized by the operating system, but you will be able to see the
spare drive from within Disk Manager or the Intel Option ROM Utility.
When a member of the RAID 1 array is broken, the computer automatically
rebuilds the mirror array using the spare hard drive as the broken member’s
replacement.
To Mark a Drive as a Spare Hard Drive:
1
In Windows XP, click
Start
→
All Programs
→
Intel
®
Matrix Storage
Manager
→
Intel Matrix Storage Console
to launch the Intel
®
Storage
Utility.
In Windows Vista, click
Start
→
Programs
→
Intel
®
Matrix Storage
Manager
→
Intel Matrix Storage Manager
to launch the Intel
®
Storage
Utility.
2
Right-click the hard drive you want to mark as a spare hard drive.
3
Click
Mark as Spare
.
To Remove Spare Marking From a Spare Hard Drive:
1
Right-click the spare hard drive icon.
2
Click
Reset Hard Drive to Non-RAID.