


Removing and Installing Parts: Dell Dimension E520 Service Manual
file:///T|/htdocs/systems/dimE520/en/SM_EN/parts.htm[10/16/2012 1:05:24 PM]
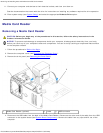
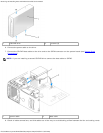
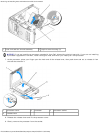
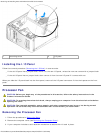
1 release tab 2 power supply 3 screws (4)
4 AC power connector
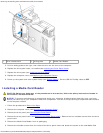
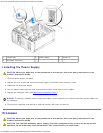
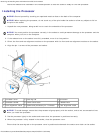
Installing the Power Supply
CAUTION: Before you begin any of the procedures in this section, follow the safety instructions in the
Product Information Guide.
1. Slide the power supply into place.
2. Replace the four screws that secure the power supply to the back of the computer frame.
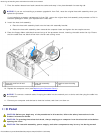
3. Reconnect the DC power cables.
4. Run the cables underneath the clips, and press the clips to close them over the cables.
5. Replace the computer cover (see Replacing the Computer Cover
).
NOTICE: To connect a network cable, first plug the cable into the network port or device and then plug the cable into
the computer.
6. Connect your computer and devices to electrical outlets, and then turn them on.
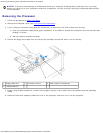
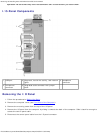
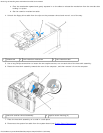
Processor
CAUTION: Before you begin any of the procedures in this section, follow the safety instructions in the
Product Information Guide.
CAUTION: The heat sink assembly, power supply, and other components may be very hot during normal
operation. Be sure that they have had sufficient time to cool before you touch them.