


Removing and Installing Parts: Dell Dimension E520 Service Manual
file:///T|/htdocs/systems/dimE520/en/SM_EN/parts.htm[10/16/2012 1:05:24 PM]
NOTICE: Before touching anything inside your computer, ground yourself by touching an unpainted metal surface,
such as the metal at the back of the computer. While you work, periodically touch an unpainted metal surface to
dissipate any static electricity that could harm internal components.
1. Follow the procedures in Before You Begin
.
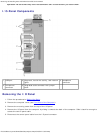
2. Remove the computer cover (see Removing the Computer Cover
).
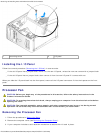
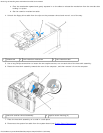
3. Remove any components that restrict access to the system board, such as CD/DVD drives, floppy drive, hard drive, and
I/O panel.
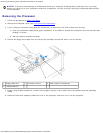
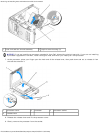
4. Remove the heat sink assembly and processor (see Removing the Processor
). Store them in a safe static free place.
5. Disconnect all cables from the system board.
6. Remove any memory modules that you are transferring to the new system board (see Removing Memory
).
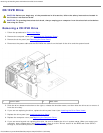
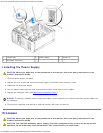
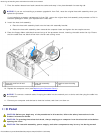
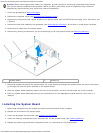
1 system board 2 screws (8)
7. Remove 8 screws that secure the system board. Six of the screws go through the system board and two of the screws
go through the heat sink pivot mounted on the system board.
8. Slide the system board assembly toward the front of the computer, and then lift the board out of the computer.
9. Place the system board assembly that you just removed next to the replacement system board to verify that it is
identical.
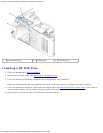
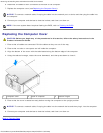
Installing the System Board
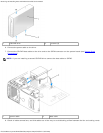
1. Gently align the board into the chassis and slide it toward the back of the computer.
2. Replace the 8 screws on the system board.
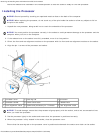
3. Install the processor and heat sink (see Installing the Processor
).
4. Install the memory modules that were removed from the old system board (see Installing Memory
).
5. Replace any remaining components components that you removed from the system board.