


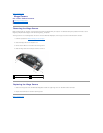

Replacing the Hard Drive
1. If you are replacing the hard drive with a new one, remove the new drive from its packaging.
Save the original packaging for storing or shipping the hard drive being replaced.
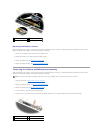
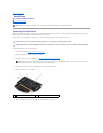
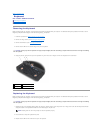
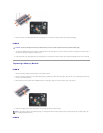
2. Attach the bezel to the hard drive using the M3 x 3mm screw.
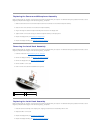
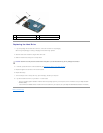
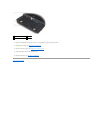
3. Slide the hard drive into the bay until it is fully seated.
4. If removed, replace the bottom of the base assembly (see Replacing the Bottom of the Base Assembly).
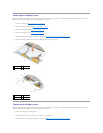
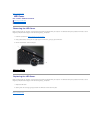
5. Replace and tighten the four M3 x 3-mm hard-drive screws.
6. Replace the battery.
7. Turn the computer over so the top side is up, open the display, and start your computer.
8. If you have installed a new drive, try and boot it. If it doesn't boot:
l Use your operating system installation media to install the operating system for your computer (for more information, see your Setup and Quick
Reference Guide).
l Use the Drivers and Utilities media to install the drivers and utilities for your computer (see your Setup and Quick Reference Guide for information).
Back to Contents Page
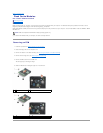
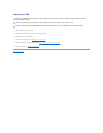
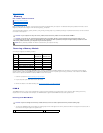
1
hard drive bezel
2
M3 x 3mm screw
3
hard drive
CAUTION: Use firm and even pressure to slide the drive into place. If you use excessive force, you may damage the connector.