


Back to Contents Page
Keyboard
Dell™Latitude™E6500ServiceManual
Removing the Keyboard
Replacing the Keyboard
Removing the Keyboard
Before working inside your computer, read the safety information that shipped with your computer. For additional safety best practices information, see the
Regulatory Compliance Homepage at: www.dell.com/regulatory_compliance.
1. Follow the procedures in Before Working on Your Computer.
2. Remove the hinge covers (see Removing the Hinge Covers).
3. Remove the LED cover (see Removing the LED Cover).
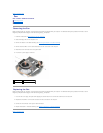
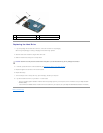
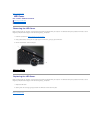
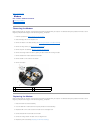
4. Remove the two M2 x 3-mm screws along the top of the keyboard.
5. Using the pull tab, gently lift the top of the keyboard only, then lift out at an angle to remove the keyboard from its connector.
Replacing the Keyboard
Before working inside your computer, read the safety information that shipped with your computer. For additional safety best practices information, see the
Regulatory Compliance Homepage at: www.dell.com/regulatory_compliance.
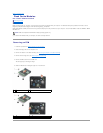
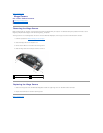
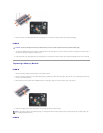
1. Holding the top of the keyboard slightly above the computer, slide the bottom of the keyboard in at an angle, and fit the tabs and keyboard connector
along the bottom of the keyboard beneath the front-inside edge of the palm rest.
2. Press each side to snap the keyboard into place.
3. Replace the two M2 x 3-mm screws at the top of the keyboard.
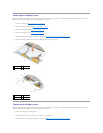
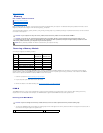
CAUTION: The key caps on the keyboard are fragile, easily dislodged, and time-consuming to replace. Exercise care when removing and handling
the keyboard.
1
keyboard
2
M2 x 3-mm screws (2)
3
blue pull tab
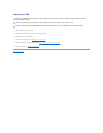
CAUTION: The key caps on the keyboard are fragile, easily dislodged, and time-consuming to replace. Exercise care when removing and handling
the keyboard.
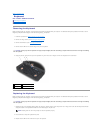
NOTE: Pressing down on the ALT keys helps to seat the keyboard properly.