


Back to Contents Page
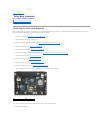
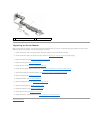
Optical Drive
Dell™Latitude™E6500ServiceManual
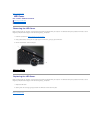
Removing the Optical Drive
Replacing the Optical Drive
The optical drive bay supports either an optical drive, a second hard drive, or an air bay for travel.
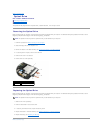
Removing the Optical Drive
Before working inside your computer, read the safety information that shipped with your computer. For additional safety best practices information, see the
Regulatory Compliance Homepage at: www.dell.com/regulatory_compliance.
1. Follow the procedures in Before Working on Your Computer.
2. Close the display and turn the computer over.
3. Remove the bottom of the base assembly (see Removing the Bottom of the Base Assembly).
4. If a security screw is in place, remove it from the drive.
5. Push the drive lever in to release it.
6. Pull the drive out of the optical bay.
Replacing the Optical Drive
Before working inside your computer, read the safety information that shipped with your computer. For additional safety best practices information, see the
Regulatory Compliance Homepage at: www.dell.com/regulatory_compliance.
1. Slide the drive in the optical bay.
2. Push the release latch in to secure the drive.
3. If a security screw was removed, replace the security screw.
4. Replace the bottom of the base assembly (see Replacing the Bottom of the Base Assembly).
5. Replace the battery (see Replacing the Battery).
Back to Contents Page
NOTE: The optical drive security screw is optional and may not be installed on your computer.
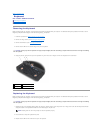
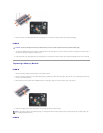
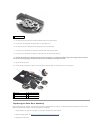
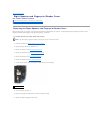
1
media bay
2
optical drive
3
drive lever
4
security screw (optional)
NOTE: The optical drive security screw is optional and may not be installed on your computer.