


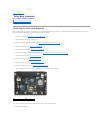
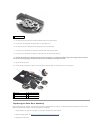

The DIMM A socket is the one closest to the system board. If a memory module is installed in the DIMM B socket, it must be removed before a memory module
in the DIMM A socket can be replaced.
1. Ground yourself by touching a bare-metal part in the computer chassis.
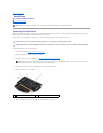
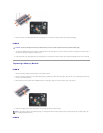
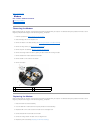
2. Remove the memory module from its anti-static packaging and, grasping the module at the side edges, align the slot in the module edge connector with
the key in the DIMM A socket connector.
3. Gently slide the memory module into the socket connector at a 45-degree angle to the system board until it is fully seated.
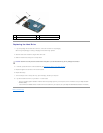
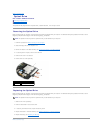
4. Push the long edge of the memory module down until retaining clips lock the module in place.
5. If a memory module is installed into the DIMM B socket, replace it using procedures in DIMM B.
Operation of the Computer
To verify your computer operates correctly:
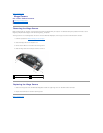
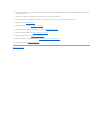
1. Slide the bottom of the base assembly into place and tighten the captive screw.
2. Insert the battery into the battery bay, or connect the AC adapter to your computer and an electrical outlet.
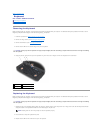
3. Set the computer upright and open the display.
4. Start your computer. As the computer boots, it detects the additional memory and automatically updates the system configuration information. Verify
that the memory capacity shown on the display is what is expected.
5. To confirm the amount of memory installed in the computer:
l In the Microsoft
®
Windows Vista
®
operating system, click Start ® Help and Support ® Computer Information.
l In the Microsoft Windows
®
XP operating system, right-click the My Computer icon on your desktop, click Properties, and then click General.
Back to Contents Page
NOTE: If the memory module is not installed properly, the retaining clips will not hold the module securely and the computer may not boot
properly. No error message indicates this failure.