


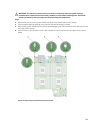
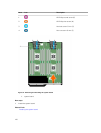

System board
Removing the system board
Prerequisites
CAUTION: Many repairs may only be done by a certified service technician. You should only
perform troubleshooting and simple repairs as authorized in your product documentation, or as
directed by the online or telephone service and support team. Damage due to servicing that is
not authorized by Dell is not covered by your warranty. Read and follow the safety instructions
that came with the product.
NOTE: This is a Field Replaceable Unit (FRU). Removal and installation procedures should be
performed only by Dell certified service technicians.
NOTE: You must remove the system board to replace a faulty system board.
1. Ensure that you read the Safety instructions.
2. Follow the procedure listed in Before working inside your system.
3. Keep the 5 mm and 6 mm Hex nut drivers, #2 Phillips screwdriver, and #2 Phillips round screwdriver
ready.
4. Remove the following:
a. processor(s) and heat sink(s)
b. memory modules
c. cooling shroud
d. hard drive(s)/SSD(s)
e. hard drive/SSD backplane
f. hard drive/SSD cage
g. storage controller card
h. expander card
i. PCIe mezzanine cards
j. IDSDM/rSPI card
k. NDC
l. SD vFlash card
m. internal USB key
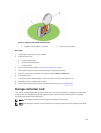
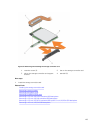
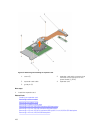
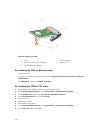
5. Install an I/O connector cover on the I/O connector(s) at the back of the board.
CAUTION: Do not lift the system board by holding a memory module, processor, or other
components.
CAUTION: Temporarily label the hard drive/SSD before removal so that you can replace them in
their original locations.
WARNING: The processor and heat sink can become extremely hot. Be sure the processor has
had sufficient time to cool before handling.
108