


Installing System Components 101
3
To remove the optical drive blank, press down on the blue release tab at
the back of the blank and push the blank out of the system.
4
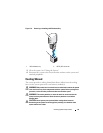
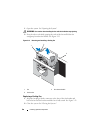
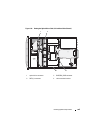
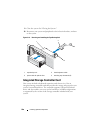
Align the optical drive with its opening in the front panel. See Figure 3-15.
5
Slide in the optical drive until the latch snaps into place.
6
Connect the optical drive cable to the back of the drive tray.
7
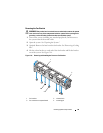
If not already done, connect the power and interface cables from the
optical drive to the system board connectors.
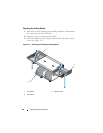
a
Connect the power cable to the DVD/TBU_PWR connector on the
front of the system board below the fan bracket. See Figure 6-2 for the
location of the connector.
b
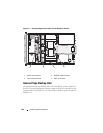
Route the interface cable along the inside right wall of the chassis. See
"Cable Routing" and Figure 3-17 for the 3.5-inch backplane chassis.
c
Connect the cable to the SATA_A connector on the system board. See
Figure 6-2 for the location of the connector.
8
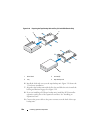
Close the system. See "Closing the System."
9
Replace the bezel. See "Installing the Front Bezel."
10
Reconnect your system and peripherals to their electrical outlets, and turn
on the system.