140 Installing System Components
Control Panel Assembly (Service-only Procedure)
NOTE: The control panel assembly consists of two separate modules—the display
module and the control panel circuit board. Use the following instructions to
remove and install either module.
Removing the Control Panel Display Module
WARNING: Only trained service technicians are authorized to remove the system
cover and access any of the components inside the system. Before you begin this
procedure, review the safety instructions that came with the system.
1
Turn off the system and attached peripherals, and disconnect the system
from the electrical outlet and peripherals.
2
Open the system. See "Opening the System."
3
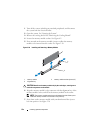
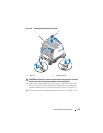
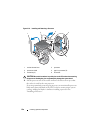
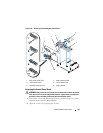
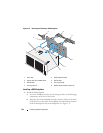
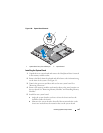
Disconnect the display module cable from the control panel board. See
Figure 3-34.
4
Using a knife or a small flat-blade screwdriver, insert the blade beneath the
front panel of the display and slide the blade across the bottom to lift the
panel outward. See Figure 3-34.
5
Bend the panel upward to allow access to the mounting screws.
6
Using a T10 Torx driver, remove the two screws that secure the display
module to the system chassis.
7
Remove the display module from the chassis cutout.
Installing the Control Panel Display Module
1
Insert the display module into the chassis cutout and secure with the two
Torx screws. See Figure 3-34.
2
Attach the replacement panel to the front of the display module.
3
Connect the display module cable to the control panel board.
4
Close the system. See "Closing the System."
5
Reconnect the system to the power source and turn on the system and
attached peripherals.


