


.
Replacing the Discrete Graphics Heat Sink
Before installing the discrete graphics heat sink, the processor heat sink must be removed. See Removing the Processor Heat Sink.
1. Apply thermal solution to the surface of the graphics chip as required. Clean excess thermal solution from the conductive pad of the discrete graphics
heat sink.
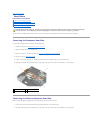
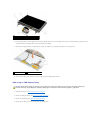
2. Place the vent-end of the discrete graphics heat sink into the computer at an angle, then align the three captive screws on the heat sink with the screw
holes on the system board.
3. In sequential order, tighten the three captive screws to secure the heat sink to the system board.
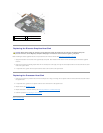
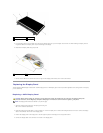
Replacing the Processor Heat Sink
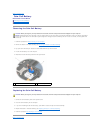
1. Place the vent-end of the processor heat sink into the computer at an angle, then align the four captive screws on the heat sink with the screw holes on
the system board.
2. In sequential order, tighten the four captive screws to secure the heat sink to the system board.
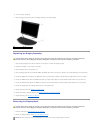
3. Replace the fan (see Replacing the Fan).
4. Replace the bottom of the base assembly (see Removing the Bottom of the Base Assembly).
5. Follow the procedure After Working on Your Computer.
Back to Contents Page
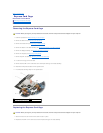
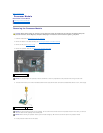
1
vent-end of assembly
2
discrete graphics heat sink
3
captive screws (3)
4
screw-end of assembly
CAUTION: Before working inside your computer, read the safety information that shipped with your computer. For additional safety best
practices information, see the Regulatory Compliance Homepage on www.dell.com at: www.dell.com/regulatory_compliance.