


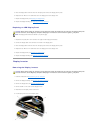


5. Route the display cable around the notch on the display cover and set the display panel in place.
6. Replace the four M2.5 x 5-mm screws that secure the display panel to the display cover.
7. Replace the display bezel (see Replacing the Display Bezel).
8. Replace the display assembly (see Replacing the Display Assembly).
Replacing an LED Display Panel
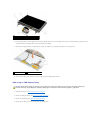
1. Replace the two (each) M2 x 3-mm screws on the right and left display panel brackets.
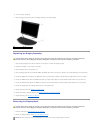
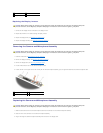
2. Connect the display cable to the connector on the back of the display panel.
3. Route the display cable around the notch on the display cover and set the display panel in place.
4. Replace the four M2.5 x 5-mm screws that secure the display panel to the display cover.
5. Replace the display bezel (see Replacing the Display Bezel).
6. Replace the display assembly (see Replacing the Display Assembly).
Display Inverter
Removing the Display Inverter
1. Follow the instructions in Before Working on Your Computer.
2. Remove the display assembly (see Removing the Display Assembly).
3. Remove the display bezel (see Removing the Display Bezel).
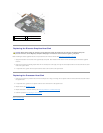
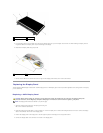
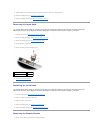
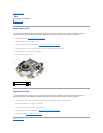
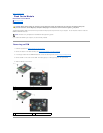
4. Remove the M2 x 3-mm screw from the display inverter.
5. Disconnect the two display inverter connectors.
6. Lift the display inverter out of the display cover.
CAUTION: Before working inside your computer, read the safety information that shipped with your computer. For additional safety best
practices information, see the Regulatory Compliance Homepage on www.dell.com at: www.dell.com/regulatory_compliance.
NOTE: The display panel brackets are labeled L (left) and R (right).
CAUTION: Before working inside your computer, read the safety information that shipped with your computer. For additional safety best
practices information, see the Regulatory Compliance Homepage on www.dell.com at: www.dell.com/regulatory_compliance.