


Back to Contents Page
Palm Rest Assembly
DellPrecision™ServiceManual
Removing the Palm Rest Assembly
Replacing the Palm Rest Assembly
Removing the Palm Rest Assembly
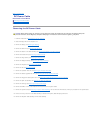
1. Follow the instructions in Before Working on Your Computer.
2. Remove the bottom of the base assembly (see Removing the Bottom of the Base Assembly).
3. Remove the hard drive (see Removing the Hard Drive).
4. Remove the modular drive (see Removing the Modular Drive).
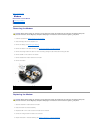
5. Remove the fan and the two heat sinks (see Heat Sinks).
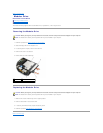
6. Remove the hinge covers (see Removing the Hinge Covers).
7. Remove the display assembly (see Display Assembly).
8. Remove the keyboard (see Removing the Keyboard).
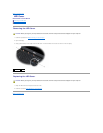
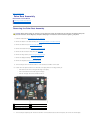
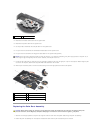
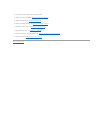
9. Turn the computer over and remove ten M2.5 x 5-mm screws and one M2.5 x 8-mm screw.
10. Loosen the three captive screws on the underside of the laptop with the front edge toward you:
l One screw near the front of the right-side edge of the laptop
l One in the middle of the left side edge of the laptop
l One near the upper left corner, marked with an "S".
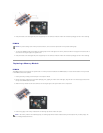
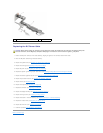
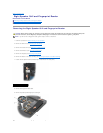
11. Turn the computer topside up and remove the four M2.5 x 5-mm screws that secure the thermal plate, then remove the thermal plate.
CAUTION: Before working inside your computer, read the safety information that shipped with your computer. For additional safety best
practices information, see the Regulatory Compliance Homepage on www.dell.com at: www.dell.com/regulatory_compliance.
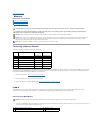
1
M2.5 x 5-mm screw (10)
2
captive screw (near hard drive)
3
M2.5 x 8-mm screw (1)
4
captive screw (near optical bay)
5
captive screw (near I/O card)