


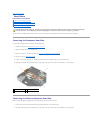


Back to Contents Page
I/O Board
DellPrecision™ServiceManual
Removing the I/O Board
Replacing the I/O Board
Removing the I/O Board
1. Follow the procedures in Before Working on Your Computer.
2. Remove the system board (see Removing the System Board Assembly).
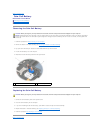
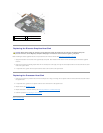
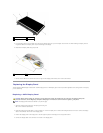
3. Remove the two M2 x 3-mm screws from the I/O board.
4. Lift the I/O board out of the base by first raising the inside (left) edge of the card, then withdrawing the right edge of the card from under the wireless
switch actuators.
Replacing the I/O Board
1. Install the I/O board into the base assembly by first placing the outside (right) edge of the card under the wireless switch actuators, then lowering the
left edge of the board onto the locator pins.
2. Replace the two M2 x 3-mm screws to secure the I/O board to the base assembly.
3. Slide the wireless switch on and off to ensure that it functions without any obstruction.
4. Replace the system board (see Replacing the System Board Assembly)).
5. Follow the procedure After Working on Your Computer.
CAUTION: Before you begin the following procedure, follow the safety instructions that shipped with your computer.
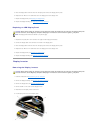
NOTICE: When removing the system board to access the I/O board, it is not necessary to remove the processor from the system board.
1
I/O board
2
wireless switch actuator
3
M2 x 3-mm screw (2)
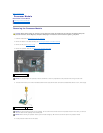
CAUTION: Before you begin the following procedure, follow the safety instructions that shipped with your computer.
NOTICE: When installing the I/O board into the base, ensure that the wireless switch actuator mates properly with the switch post on the I/O board.