


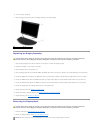

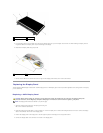
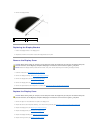


5. Lift the display panel out of the display cover and lay the display panel flat on your workspace. Use extreme care when handling the display near the
hinges and cables on the display cover to prevent damage to the display.
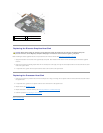
6. Disconnect the display cable using the pull tab.
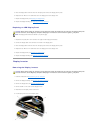
7. Remove the two M2 x 3-mm screws from both the right and left display panel brackets, then remove the brackets.
Replacing the Display Panel
The Dell Precision M4400 laptop includes either a CCFL display panel or an LED display panel. Use the procedure applicable to the configuration of the laptop
you are assembling.
Replacing a CCFL Display Panel
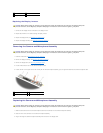
1. Attach the display panel brackets to the display panel using four
M2 x 3-mm screws for each bracket.
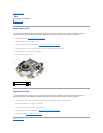
2. Place the display panel upside down on your workspace, in front of the display cover. Connect the backlight cable to the inverter. Connect the display
cable to the connector on the back of the display panel.
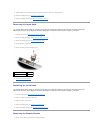
3. Position the display panel in the display cover. Use the alignment posts in the display cover to align each bracket.
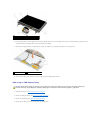
4. Connect the display cable to the connector on the back of the display panel.
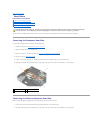
1
M2.5 x 5-mm screw (4)
2
display panel
3
display cover
1
back of display panel
2
display panel cable connector
CAUTION: Before working inside your computer, read the safety information that shipped with your computer. For additional safety best
practices information, see the Regulatory Compliance Homepage on www.dell.com at: www.dell.com/regulatory_compliance.
NOTE: The display panel brackets are labeled L (left) and R (right).